Thursday, October 31, 2013

How Does Frankenstein Eat His (Bento) Lunch?

Shaped Biscuit Pizza Sandwiches and Molded Cheese for Halloween!
No, I didn't make the Frankenstein truffle. I was so excited when I found out they were all-natural so I had to have one! But it was the inspiration for these lunches!

Box Full of Frankenstein for Big Sis
GF cheesy biscuit (dairy-free) olive pizza sandwich, mozzarella, dye-free truffle; organic carrots, peas, and grapes
I molded the mozzarella in a Halloween cake pop mold rather than an ice mold, and it worked great! (More info at the bottom of this post!)

To help the veggies stay in-theme, I used a mini foot cutter - Frankenstein is pieced together from various body parts after all!

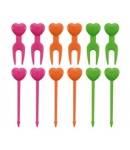
And this time I remembered to include a heart! Yay! I added a heart pick to the grapes, along with a disposable paper Frankenstein pick I got on clearance last year (Target exclusive, I think.)

[This post contains affiliate links.]
Keep scrolling to the bottom of this post for details on how I made the biscuit sandwiches themselves!

My Frankenstein muffin pan came from JoAnns or Rite Aid or somewhere, but this one or this one would work for something Frankenstein-y, or this one for other Halloween shapes! I used some natural black food color (powder mixed with water) and painted it on with a cheap plastic-bristle paint brush I reserve for food (plastic bristles are easier to keep sanitary versus hair bristles!)

For the neck bolts, I used these bone picks, although the dot ones were a close second choice!

Frankenbaby
GF cheesy biscuit grilled (dairy-free) cheese sandwich; organic carrots, peas, apples, and grapes
E's biscuit was baked in the same muffin pan as Big Sister's except a certain dummy mixed up the halves and paired up two back halves and two front halves. No way to salvage, as this was the only grilled cheese one I made. The rest were pizza. Boo.
So I made lemonade and just painted on a friendlier face. I didn't add any "filler" foods because E was sick (bad virus with a fever and a Croupy cough) and she wasn't going to eat much anyway. I didn't want her just eating crackers or treats instead of the healthy stuff.

Tools of the Trade
    handle picks
Japanese Bento Box Accessory Food Pick 20 pcs In Love   

Molded Cheese Shapes
I was inspired by this tutorial from Hungry Happenings, but I did my Franken-cheese a little different.
Instead of grating mozzarella, I just cut up a stick of string cheese and jammed as many nibblets as I could into my mold, making sure to get pieces in the sticky-outy bits, like the bolts at his neck.
I microwaved for 15 seconds, then took it out and poked at it a bit and added a few more nibblets to fill the space made by the melting. Then I put it in for another 10 seconds, and made sure to poke the back in a little more, to hopefully fill out all the details in the mold.

Shaped Biscuit Sandwiches
I used a gluten-free Chebe Cheese Bread mix and instead of dropping it in balls onto a baking sheet, I divvied it up and jammed it into the muffin cups of some shaped muffin tins. I pressed down a bit, to make sure to get all the details.

After baking, I sliced them in half, toasted the insides for a few minutes, added the sauce and grated dairy-free mozzarella on both halves, and put sliced olives on just one half of each pair. (Just dairy-free cheddar for the grilled cheese ones, on both halves.) Then broil them for 3-5 minutes, pair the halves together while the cheese is still melty, so they stick. And then done! 

*The Chebe mix was a bust. It was flavorless (according to Hubby. Dairy makes me sick, so I didn't taste-test, as I'd added real sharp cheddar to the bread, plus the mix contains dairy.) And super dense. So I'll use a regular biscuit recipe or mix next time.
That's actually what inspired me to turn these into sandwiches! Gluten-free baking is often bland, so you want to add extra herbs and spices to the mix before baking. Which I neglected to do. Doh! So I had some tasteless Frankenstein hockey pucks, and figured slicing them thinner would make them easier to chew, and the sauce and "cheese" would help salvage and moisten them! Yay!

And since "Doctor Frankenstein?"  "No, it's Frahn-ken-STEEN" ran through my head the whole time I made these...

Wednesday, October 30, 2013

"I Vant to Suck Your Ketchup" Vampire Potato Smileys!

I was inspired to make purple mashed potatoes from @FunLunchChallenge on Instagram, and then use them to make "Smileys." Smileys are frozen mashed potato patties with faces cut out. The store-bought ones aren't gluten-free, so we can't have them, not that I've ever seen them in a store near me. Once I discovered I could make my own though...

Big Sister Vampire
Organic apples and raspberries, home-made organic ketchup, GF PBJ, purple potato Smileys
Monday, 10/28/13 - I didn't want to just copy last year's vampire lunch, but I couldn't think of anything else, until I was making these Smileys and got the grand idea to cut fangs and widows peaks into some of them too! (Recipe at the bottom of this post.)

Z would need some grains in her lunch, and vampires need a coffin. So...
I made the sandwich using a coffin cutter on some gluten-free bread (saved the scraps for another project!) and used a butter knife to "paint" on some chocolate syrup to make the cross on the top slice.

I had started out hand-forming the Smileys, but they were lumpy and all kinds of sizes, and somewhat bigger than I'd hoped. So I went and got a small circle cutter and started making them assembly-line style. Much cuter!

[This post contains affiliate links.]

Little Sister Vampire
GF PBJ, purple potato smileys; organic sugar snap peas, apples, and raspberries
E didn't end up eating much. She licked the filling out of the sandwich (I had spread it on extra thick, since that's usually all she eats,) and maybe nibbled the potato smileys. They were all torn up. She ate her peas, a few raspberries, and nibbled the apples. In her defense though, she was sick. She'd had a sore throat and Croup with a fever all weekend and still hadn't recovered. So I was impressed that she ate at all!

Tools of the Trade (See below for Smileys recipe!)
    

DIY Potato (Vampire) Smileys

Ingredients:
Cooked mashed potatoes* (fun way to use leftovers!)
Flour, corn starch, or gluten-free flour
Oil for frying

Tools: 
Straw, dowel, or clean pencil or small pen
Small knife/steak knife

Directions:
1. Add flour to the mashed potatoes. Roughly 4 Tbsp per 3 large potatoes, mashed. So you'll probably have to eyeball it. You want the potatoes to no longer be sticky, but not all dry and crumbly. If the potatoes are still warm, stick in the fridge until cool.

2. Shape the patties: 
Quick and Sloppy: Roll potatoes into balls the size of a golf ball or smaller. Flatten to 1/4"-1/2" thick and try to tidy up the edges. (Optional: you can hand-mold into other simple shapes, like hearts.)
Neat and Tidy: Flatten out a largish chunk of potatoes until around 1/4"-1/2" thick. Use mini circle cutter (or other shape - I had a special request for hearts and butterflies...) and try and remove the scraps in between as you go. You can add them back into the collective and smoosh them out later. 

3. Use a straw to poke eye holes and blow them back out into your pile of unshaped potatoes (or the garbage, if you think breath on your food is icky) or use a dowel or clean pencil or pen to imprint holes.

4. Use knife to make smiles. You can either make a slice and kind of smoosh it more open, or actually cut out a whole smile, which is more labor intensive. Use the same idea to make fangs and widow's peaks (if desired) for vampires, or pirate eye patches and head scarves, or mummy bandages, or whatever. The possibilities are endless! (I made a few fun experiments. Hopefully you'll be seeing them soon!)

Note: I found it easier to sort of go assembly-line style. Flatten out a bunch of potatoes, cut circles and clear scraps, make eyes, make smiles, then transfer to baking sheet to wait. Then repeat.

You can freeze them for several months (lay on a baking sheet and freeze for 30-60 minutes, then move to a freezer bag.) Do not thaw before cooking, just plan to fry a little longer.

5. Heat oil on med-low in a frying pan (or deep fryer.) Fry as many Smileys as you can fit, without any touching. Should cook for a few minutes on each side, or until golden brown. Place on paper towels to drain and absorb excess oil.

Should last a week in the fridge, or freeze using the same method as the un-cooked ones, and re-heat in the oven at around 430 degrees for 12-15 minutes (that's based on directions for the brand-name pre-cooked frozen ones.)


*My mashed purple potatoes were made with a colander full of purple potatoes, cut; a medium white onion, cut; and 8 or so cloves of garlic, peeled and smooshed. (All organic, from the farm we go to get our weekly produce share.) Plus some salt. I cooked them with 2 cups of water, covered, on med-high heat until they were soft. Since I hate wasting vitamins by draining water, I use less and make sure to stir more often, so they don't burn at the bottom of the pan (and I fail about half the time...) Then instead of adding water or milk or broth, I just mash them with the water they already have, and whizz around with an immersion blender, if the peels aren't breaking up well. (I don't peel my potatoes unless I have to!)

Tuesday, October 29, 2013

It's A Wrap! Easy Halloween Mummy Quesadillas

Easy Halloween Mummy Quesadillas!
The pumpkin patch I went to with Z's Kindergarten class had an extensive gift shop - we were able to find several dye-free candies and treats there. My most exciting find were the all-natural Halloween chocolates! I couldn't resist - I bought one of each shape they had! 

Kiwa mixed vegetable chips, dye-free mummy chocolate, organic apples w/raisins,
organic rainbow carrots, GF tortilla w/green olives and organic white cheddar 
Friday, 10/18/13 - Because that little treat compartment would be perfect for the mummy truffle, I knew I wanted to use our Planetbox. (Even though the chocolate was a wee bit taller than the compartment. And wouldn't you know it, I stupidly tested the lid before taking photos, so the nose got mashed. Doh!

Apple of My Eyes: But using the Planetbox turned out even better than I'd planned, since the apple eyes were a last-minute inspiration due to the shape of the compartment! Because the compartment is long and skinny, the apples only fit sideways, and I noticed they looked kind of like eyes and brows laying in there. Genius!
(I didn't bother using anything to "glue" the raisin pupils down. The box lid kind of pinched them into place for me. But a dab of nut butter (or non-nut butter) would do the trick!)

Yummy Mummies: The mummy quesadillas were beyond easy! I just used a circle cutter on a gluten-free tortilla, sprinkled cheese (Trader Joe's non-dairy shreds) on half of them, then used a knife to cut the remaining circles into uneven strips. I pulled one strip out of each, to make room for the olive slice eyes and laid them out on the cheesy circles leaving a bit of space between so the "bandages" were more obvious. Then I broiled them for a few minutes until toasty and melty.

Tools of the Trade
 
[This post contains affiliate links.]