Wednesday, February 29, 2012

Top Five - February 2012

Top 5 Posts:


3. You're All Heart bento


Top 5 Referring URLs:
From my link-ups to What's For Lunch Wednesdays
Again with this one! Amazing! I linked up AGES ago. I love to see how many people are interested in eating and packing healthier lunches!
From the Bento of the Week link-up
From a joke I posted on the EasyLunchboxes Facebook page

Top 5 Referring Sites:
2. bentolunch.net (What's For Lunch at Our House)
Finally! Google, Facebook, and Networked Blogs aren't in the top 5! In fact, for the first time ever, Google wasn't even in the top 10! And for the first time, Pinterest WAS! (and Lunches Fit For a Kid just eked in at #9!) It's pretty exciting to see people visiting and discovering my blog via other blogs, versus just my Facebook posts and typing in my URL or finding me via random searches on Google.

And as for interesting search results, 6 of the top 10 were about St. Patrick's Day crafts, worded in various ways. Cheap, simple, easy, St. Patrick's, St. Patty's, etc etc. All which found my craft post from last year. Fun!

My TOTALLY Square My Square Meal

I was super excited to try out my new My Square Meal bento lunch box. I like the different-sized compartments and the idea behind this box was really fun. 
The My Square Meal box was designed by teacher/moms who call themselves the Lunch Ladies to solve a problem they saw in the lunchroom: kids filling up on just one or two of the full-sized food items they had in their lunches - usually the snack or dessert items, like chips and cupcakes. The solution? Smaller portions of a greater variety of foods. Which has been my attitude all along. She can't fill up on just a mini-cupcake, so still has room for her healthier foods.  So this box sounded right up my alley!
They sent me the yellow one to review, but  they are also available in red! They also have cute lunch bags to hold them, but I wasn't sent one to review. These bento boxes are 8" x 8", so they don't fit in most bags, but I have larger insulated totes from Trader Joes, so I wasn't too concerned. Not as cute and stylish and school-worthy, but I can keep the box flat this way, while their bags are designed to hold them sideways.
CoJack and cheddar squares, carrot squares, letter cookies, mini Saltines
and Special K crackers, apple squares, turkey squares, ham squares
When the My Square Meal box first arrived, Z had initially been disappointed that it wasn't purple with flowers. But that quickly turned into "when can I have this for my beautiful lunch?"
I had a feeling that with the upright-standing-lid that this wouldn't be fantastic in the car, so since most of our "beautiful lunches" are eaten on the go, it took me a while to have the right circumstances to finally try this out: a day with no morning plans, so we'd be home for lunch, and time to actually get it done before lunchtime!

She was super excited to get her lunch in this box finally, and loved the square theme I did using my FunBites Cube It! cutter. The cheese and meat were easy to cut, and I saved the scraps for making pocket sandwiches later. The carrot was cut into planks lengthwise to get the most squares per cut as possible, but if you have the time and inclination (and want the lighter markings in the core of the carrot as a sort of star in the center, rather than a stripe across the square,) it works great on carrot coins too. For the apple I cored it and cut it into 1/4" planks vertically. My apple was a bit mealy, so it broke up a lot with the cutter. And it wouldn't punch through the peel, so I had to hand-cut the peel part for those slices.
But the squares fit into the compartments perfectly! It was like they were made for each other!
The letter cookies came from Albertsons.
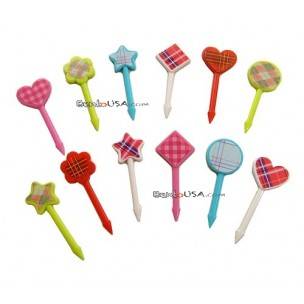
To keep with the square theme, I used some square picks from my checkered picks set.
checker picks
Since she was still working on her lunch when we had to leave that afternoon for my doctor appointment, we ended up using it in the car anyway! As expected, it was hard for her to adjust to. I hadn't wanted to risk setting it with the lid side at her knees, in case the lid overbalanced and toppled the whole thing off her lap. So I set it sideways and the lid kept slamming shut on her left fingers when she tried using her right arm to eat. She got the hang of it pretty quickly, but there were several minutes of crying there at the beginning. And it almost got thrown in frustration.

What I liked least:
  • I was not a fan of the grooves for dividers. This is clearly the same mold as a tackle or craft box, but made with food-safe plastics. I wish they had food-safe dividers included, or at least available separately to customize this even more.
  • Because the lid stays on, and doesn't bend all the way back, it would not be ideal in the car, or anyplace else where the table surface moves, like on a boat or RV. Could also pose problems at a busy lunch table with lots of little excited arms flailing around. The lid stays upright pretty well on its own, but too much wiggling or bumping it and it slams shut. Also takes up a ton of space in the dishwasher.
  • Because the corners are sharp instead of rounded in all the compartments, could be hard to get sauce or dip cleaned out properly.
What I liked most:
  • Dishwasher-able! For those of us who aren't big on hand-washing! Hoody-hoo!
  • Long compartment is large enough for regular-sized utensils! Don't have to use fancy bento or toddler-sized ones just to get them to fit!
  • The FunBites squares fit perfectly - like they were designed for each other!
  • All those compartments motivate and challenge me to choose a wider array of foods and food groups. When I serve lunch on a plate or in a bowl, it tends to be just one or two foods, like a sandwich and orange, or hot dog and cheese stick. But with this, I had to keep thinking of what I could put into the other compartments and ran through the food groups in my head to make sure I had some of everything.
Disclaimer: I received a free My Square Meal box to review. All opinions are 100% honest and my own.

February 2012 Bento and Fun Meal "Leftovers"

These are the meals that never made it to their own posts.

Tuesday, 2/14/12, Valentines Dinner - Got a heart-shaped pizza from Papa Murphy's. I like their take-n-bake pizzas because they're not skimpy with the toppings, they're made fresh, and are almost as cheap as the refrigerated ones at the grocery store. The store by me has weekday specials, so if you get the special and use a $ off coupon, they're usually cheaper than the grocery! But their heart ones were $7 or $8 and only available on Valentines Day, so I 'splurged' and got one. They come with pepperoni, which Z and I hate, but that's the other nice thing about Papa Murphy's. Because they aren't pre-packaged and smooshed together in processing and shipping, the toppings are super easy to remove.

How it comes
So I took the pepperoni off half of the pizza and added ham and spinach, per Z's request. Normally she wants olives too, or just olives, so this was a nice surprise. The ham was leftover from the Valentines potluck we had gone to that morning, cut into squares using my FunBites Cube It! cutter.
Since we I like puffier crusts with crispy bottoms, I let my pizza sit out and get warm for a while (at least 30 minutes) before cooking it. This causes the dough to rise a little and get fluffier (fill with tiny air bubbles.) Yum! Then I follow the regular cooking instructions, but subtract 5 minutes. For the final 5 minutes, I slide the pizza off the baking tray thing and have it cook just on the rack. This gives it a crunchier bottom.
Cooked
In hindsight I should have had a heavier hand putting on the toppings, but I was worried that they wouldn't stick if they weren't touching cheese. Ah well.

Thursday, 2/16/12 - Made a ladybug pocket sandwich lunch to eat in the car between Little Gym and preschool. 
Z's lunch: turkey and cheese scraps pocket sandwich, string
cheese nibblets, spinach w/carrot flowers, strawberries
Mostly made the sandwich to do a DIY custom pocket sandwich tutorial post, since she's happy with PBHoney and I usually eat the scraps for myself.
My lunch: spinach salad w/broccoli, blueberries, strawberries,
almonds and dressing. Mini cupcake, Special K crackers, 1/2 PBJ

I had been toying with the idea of seeing if a half sandwich would fit in a smaller compartment of the EasyLunchboxes if I cut it into half (or two quarters of a regular-sized sandwich,) so I gave it a try. Yes! I used home-made blackberry-raspberry freezer jam, but it was starting to gel and crystallize. Should have used honey. Tasted okay though.
She didn't care that the sandwich was mangled. She ate off all the sprinkles, took a few bites of bread, and ate the meat and cheese out of the center. She ate all the nibblets and strawberries, and only a little bit of the carrots and spinach.

Monday, 2/27/12 - Daddy packed her a snackery bento to nibble on the way to preschool, but mostly to eat between school and swim class.
Apple, Wheat Thins, Thin Mint cookie, yogurt, spinach
She likes to wear her collapsible clothes hamper as a hat, and since she can fit safely into her car seat, and it doesn't block my rear view, I allow it in the car. She even did fine eating from her EasyLunchboxes with it, until she tried to drink from her water bottle. No love. She had to take it off to drink.
She ate half the apple, some yogurt, and the cookie. Maybe a cracker or two, but I think not.

Tuesday, February 28, 2012

Easy Peasy Chicken Curry, Crock-Pot-Style!

I got the idea to make this from my Fit-It and Forget-It cookbook, but the recipe there kept the chicken whole, and had you do some weird sauce-thickening thing at the end. Plus it called for orange juice and sweet potatoes. Who ever heard of curry made with OJ? So I did a little tweaking and used it as a guideline for my own recipe. Which is far easier and less weird sounding.

Super-Yummy Crock-Pot Chicken Curry
Ingredients:
2 boneless-skinless chicken breasts, cut into chunks
1.5 lbs potatoes, cut into chunks (3-5 small to medium)
1/2 to 1 small onion, chopped
2/3-cup to 1-can coconut milk
1 clove or 1 tsp garlic, minced
1 tsp chicken bouillon or chicken soup mix
1 tsp salt
1/4 tsp pepper
3-4 tsp curry powder
Optional: Canned green beans, fresh green beans, broccoli, fresh or frozen peas, carrot coins, etc.

Directions:
Step 1: Place chicken in slow cooker. Cover with onions and potatoes (and other veggies, if desired.)

Step 2: Combine coconut milk, garlic, chicken bouillon or soup mix, salt, pepper, and curry powder. Pour over vegetables.
Note my microscopic crock-pot

Step 3: Cover. Cook on High 3 to 4 hours. (Or Low 5-6 hours.)


Do not mistake chili powder for curry powder! My first attempt was delayed due to not having any curry powder, thinking that the three jars of chili powder in the pantry was what I needed. Doh! Might've added a nice little kick, though!
The first time I made this I did a small batch and measured out the 3/4-cup coconut milk and 4 tsp curry powder. The curry flavor was too strong for my tastes, and more sauce wouldn't have been amiss. So the next time I made a double batch, and used the remainder of the coconut milk from the first can, plus a second can, and only 6 tsp curry powder. Yum!

Since my crock-pot is the size of a thumbnail, for larger batches I use a large pot with metal handles and a lid and put the whole thing in the oven on 300 F for High, or 200 F for low.

Now I just always make a double batch (4-5 chicken breasts, 8ish small-to-medium potatoes, 1 small onion, 2 cans coconut milk, 1 tbsp chicken soup mix, 2 tsp salt, and 6 tsp curry powder, and I add 3 tsp/1 tbsp garlic, since we love garlic!) and add in whatever veggies I have lying around. In the photo above I had added a can of green beans and all the broccoli left from a veggie tray party platter from our Superbowl party, and you can't even tell! The veggies just disintegrated! Z said she didn't want broccoli, but she couldn't find any chunks big enough to pick out! Fantastic! Plus any vitamins that leeched out during cooking are still in there, somewhere!


Checking Out the "Competition" - Family Fresh Meals

Corey at Family Fresh Meals makes adorable bento and muffin tin meals for her girls, Big D and Little D. She's probably really nice too, but I can't get past her awesome photos and gorgeous bentos enough to try and not hate her.

I love this Heart Explosion meal made in an ice cube tray instead of a muffin tin or bento box. Super cute! And totally doable!

Some of her bentos, like her Bunny Love meal, are attainable by mere mortals, such as myself. Even though she made a heart-shaped sandwich ball using an egg mold, without describing how it was done! Argh!

While others make me want to slap her. Because I don't handle jealousy well.
Check out this colorful Unicorns and Rainbows bento. Squee!

While others, like her Oscar and Slimey salad just make me just want to cry. It was probably simple and effortless for her, but I know I would have had spinach and poorly-cut rejected Slimey's all over the kitchen had I tried to do this. Not that I ever would have thought of it!

She also does a weekly recipe link-up to show off your favorite recipe (that fits that week's theme) or to get some yummy ideas. So naturally, one can also expect to find a crap-ton of recipes. Neatly organized into categories and themes, no less!
If you like to burn stuff cook or love to just look at beautiful food and wonder what all those words mean and be inspired, check out Family Fresh Meals. And in between cooking, blogging and sorting her recipe posts by meal or holiday, she also has time to post stuff on Facebook and Twitter. I bet she even manages to shower every day too! Argh!

Monday, February 27, 2012

How to: Mangle a Pocket Sandwich

Since I've been making some custom pocket sandwiches lately to use up all the meat and cheese scraps, I thought I'd do a tutorial to show how it's done. So naturally, I mangled the whole thing. Enjoy.

Ladybug?
Z's lunch: String cheese nibblets, turkey and cheese pocket w/sprinkles,
spinach w/carrot flowers, strawberries
Step 1: Cut bread into desired shape. You can use a cookie cutter or a knife. For best results, cut one slice of bread at a time.
I used a ladybug cookie cutter, which turned out to be a poor choice.The fewer protrusions, the better. A heart works great, and a Hello Kitty should also turn out well.
Step 2: With finger, smoosh flat the center area of both slices of bread, leaving the edges alone.
Step 3: Add sandwich fillings to bottom slice. You can use spreads or meats/cheeses, but be sure to leave the rim around the edge clear.
This is a great way to use scraps from making cute shapes out of meat and cheese.
Step 4: Put top slice over fillings and line up edges with bottom slice as best as you can. Using your fingers or a knife handle, smoosh edges together. The tines of a fork work well too, like with pie crusts, but aren't as neat looking.

Ta-dah!
Yeah. Freaky, I know. Somewhere in there it lost its cute ladybug-like demeanor. So my errors were in choosing a bad shape that didn't translate well when smooshed, and our bread. My husband just bought a new brand of bread that was dryer than the kind we normally use, which caused it to split around the edges, rather than stretch. And the edges didn't seal well for the same reason.
So I used PB to glue on some flower sprinkles to make it look more ladybug-like, told Little Z that it was a ladybug, so naturally she loved her ladybug sandwich! Score!
Had the edges sealed properly, I would have popped it into the toaster to help melt the cheese bits so they wouldn't fall out if she ate around the edges. Oh well.

Some of my more successful attempts: wonky-shaped toasted pocket and heart pocket sandwich.

Friday, February 24, 2012

How To: Use Up Cabbage You Were Conned Into Buying But Don't Want to Eat as Salad (Blech)

After being suckered into buying two heads of cabbage (one green and one purple. No, not the half ones. "Whole BALL ones. 'DIS ONE! Right here. And 'DIS PURPLE ONE! No not 'DAT one! 'DIS one!") by my little angel, I put out a call for recipe suggestions from my fellow bento-ers. Anything but sauerkraut (yuck!) or cole slaw (bleah.) Myra from Mommy + Me Lunchbox came back with the only one that looked simple enough even a monkey I could do it. Plus I could pronounce all the ingredients!

Filipino-Style Cabbage Stir-Fry
Ingredients:
1 lb ground beef
1 onion, thinly sliced
1 cabbage, shredded
2 cloves or 2 tsp garlic, minced
1/8-1/4 cup soy sauce
1/2-1 cup water
salt/pepper, to taste

Directions:
Step 1: Brown ground beef. Drain some of the excess oil, but leave enough for Step 2. Set ground beef aside.
Step 2: Saute garlic and onions, until onions start to become translucent. Add back ground beef.

Step 3: Add cabbage; stir.
There was soooo much cabbage I had to add it in waves, letting it cook down before adding more. There was much stirring. So either use a really big pan/wok, or plan on feeding the baby first not needing to step away for a bit.
Step 4: Add 1/2 to 1 cup water. Stir.
I added a whole cup. In for a penny...
Step 5: Season with soy sauce (1/8 to 1/4 cup, depending on how salty and soupy you like it.) Season with pepper and salt (may not need salt, depending on soy sauce amount.)
We weren't sure if the soy sauce was meant to be added while still cooking, or after. But since Myra said 'season with' we assumed it meant after. 1/4 cup was waaaaaay too much. Our stir fry was swimming! I had to drain a bunch of it out. Next time I will try using less and adding it with the water during cooking.

The Verdict: Meh. I wasn't in love with it. It wasn't no PF Chang's Lettuce Wraps, but it wasn't "hoy-ri-boh" [how Z pronounces 'horrible'] either. And it was certainly easy enough to do. I clearly used too much soy sauce, which made it a dominant flavor. But that's fixable, with a do-over... Plus I got a larger package of beef and saved the rest of the onion to make Porcupines another night, which saved me some money (I don't usually plan meals close enough together to share ingredients, so often get some waste or just buy smaller quantities,) which pleased Hubby to no end. He likes when I feed him, especially when I make imminent plans to do so again!
Hubby liked it enough to eat the rest as leftovers and still want it again. Luckily I happen to have another head of cabbage lying around...

Hello, Hello Kitty!

In case you hadn't noticed, I tend to avoid licensed characters in my food art. Or when I do one, like with Pinkalicious or Are You My Mother?, it tends to be the idea of the character, rather than more exact. But this week's Bento of the Week theme at Bento Blog Network is Hello Kitty. And my daughter loves Hello Kitty... and I happen to own a Hello Kitty cookie cutter set... So I could try my hand at making an actual Hello Kitty...
Ugh. What a pain.
Strawberry, kiwi, and carrot flowers,
Hello Kitty ham and cheese (Laffy Taffy bow)
I used my large and small bento veggie cutters for the strawberries, kiwi, and carrots. The strawberries and carrots are in Hello Kitty cupcake liners (turned inside-out so she can see the design!) but the kiwi was too juicy, and I was afraid they would soak through the liner overnight. So I used a red silicone cup from Cost Plus World Market ($3/6!) instead.
For Hello Kitty herself, I use mini chocolate chips for the eyes, a sprinkle quin for the nose, and jimmies sprinkles for the whiskers. For the bow, I used a red Laffy Taffy from her Valentines Day loot. To make it easier to work with, I microwaved it for 10 seconds to soften it. Then I flattened it out (I used my fingers, but you can use a rolling pin, and powdered sugar to keep it from sticking, if necessary) and used a plastic Hello Kitty cutter I got in a set from the Sanrio store and pressed the Taffy up against the bow to get the general shape and design imprint, then used a steak knife to hack off the extra bits. And then pulled and pushed it back into shape again. A few times...

I used the face cutter on each slice separately, to reduce pulling and damage to the bread. My husband actually did the meat and cheese for me. And he cut a new slice of bread and moved all the features over "in exactly the same places" since I was interrupted by Baby E after putting the face together and we fell asleep, so the bread had started going stale. [Don't tell my sweeetie, but the bow is slightly off. But it was stuck down pretty good by the time I woke up, so not worth trying to rip it away to move it.]
I got the Hello Kitty bento box either from the Sanrio store or else from a Sanrio-type cutesy Asian gift shop at the mall. This lunch is smaller than normal because the dairy is on the sandwich, rather than the side, like when I do PB-based sammies, but also because we all have colds and my Little Missies aren't eating as much lately. So this cute little snack bento is probably plenty for lunch and afternoon snack.
She's been eating her "beautiful lunches" in the car so much, that now she expects one every time I fasten her seatbelt! So she asked for her Hello Kitty lunch to take on the ride to gym camp (the local My Gym does camps this week since many schools are out for MidWinter Break.) Even though she had just eaten breakfast! Sure enough, she only ate the candy off the sandwich. And a carrot flower. The rest I took back home until it was time to pick her up.
After camp she gobbled down the sandwich and asked for another. So I made half a ham and cheese sandwich (no fancy shapes) and cut it into half again, and stacked the sandwich squares to fit into her bento box. She was thrilled with her "biiiiiiiiig!" sandwich. She ate most of that one too (she left the crusts from one of the halves,) and tried the kiwi. She claimed to like it, but only ate one of the flowers. She ate a few strawberry flowers, and some carrots, but most ended up getting dumped on the floor when she knocked the whole thing over. Oh well.
  

Thursday, February 23, 2012

Weird Crap My Kid Eats

1/24/12 - Spinach and blackberries with soy sauce to dip. She ended up having two-and-a-half servings that night! Oy! A week's worth of sodium!

2/6/12 - Cabbage with Ranch (green butterfly muffin cup) and ketchup (red YumBots robot muffin cup.) She had never had cabbage before, but for whatever reason when I was rolling the cart past them to find the spinach, she wanted a head. I tried to talk her into the purple kind, or just a half-head, but she wanted a whole one, and she pointed to a specific one to get. I'm fine throwing away trying something new, as long as she actually eats some of it. And letting them pick out something to try is a great motivator for them to actually try it.
She ended up eating it all (not the whole head. Just the four-ish leaves I had put on her plate.)

For my views on using dips to motivate better eating, read my Eating Tips and Tricks: Dip post!

Wednesday, February 22, 2012

Peanut-Free, Tree Nut-Free Lunch Options: Biscoff Spread

One of my blogger friends, Keeley has a peanut/tree nut-free household due to severe allergies. She told me about this nut-free Speculoos spread, Biscoff, that is made from cookies. I'M IN!
Before trying it out on Little Z, I had to taste-test it myself. You know. For research purposes.

I happened to be heading out for my monthly MOMS Club board meeting soon after it had arrived on my doorstep, so I decided to give it a whirl.
My dinner: Peanut and almond MandMs, spinach salad w/
blueberries, almonds and raspberry vinaigrette.
Biscoff on bread, Biscoff on tortilla
Since I love Nutella on tortillas, I wanted to try this out on one too. I also slapped in a half-sandwich, to try it on bread while I was at it. For a full scientific comparison.
I actually preferred it on the bread. The spread is fairly dry, as are tortillas, so the roll-up, while tasty, was overall too dry for me. The bread was nice and moist, and was by far my favorite.
Keeley (the expert) says her daughter likes Biscoff with jelly as well, but I didn't try it. Nor did I try it with honey. To me, those are sweeteners for plain spreads like peanut butter, almond butter, or SunButter. I don't mix Nutella with anything, but if I did, it would be PB. I didn't try this with PB yet either though. It's pretty yummy, and I didn't want to ruin it by making it healthy. Plus it defeats the whole purpose of a nut-free alternative if you slap a nut butter on it! I might try it with SunButter sometime, which is another nut-free spread. I bet it would taste like Nutter Butters though!

Comparisons, per 2 tbsp (37g)
(Jif) Peanut Butter: 190 calories (130 from fat,) 16g fat (3g saturated fat,) 150mg sodium, 7g carbs (2g fiber, 3g sugar,) 7g protein, 4% DV iron, 15% Vit E, 2% riboflavin, 20% niacin [contains peanuts]

Nutella: 200 calories (100 from fat,) 11g fat (3.5g saturated,) 15mg sodium, 22g carb (1g fiber, 21g sugar,) 3g protein, 4% DV calcium and iron [contains tree nuts, dairy]

(Trader Joe's) Sunflower seed butter: 200 calories (140 from fat,) 16g fat (2g saturated, 6g polyunsaturated, 8g monounsaturated,) 120mg sodium, 7g carb (4g fiber, 3g sugar,) 7g protein, 2% DV Calcium, 8% iron

Biscoff Spread: 176 Calories (104 from fat,) 12g fat (2g saturated,) 66g sodium, 16g carb (0g fiber, 10g sugar,) 1g protein [contains soy, wheat]

The calories are fairly comparable, with Biscoff the lowest by a slim margin.
Surprisingly, the "cookie spread" has half the sugar of Nutella! Which, while delicious, would still be yummy with less sweetness, in my opinion. Obviously the peanut and sunflower butters are lowest in sugar, because they aren't sweetened for the sake of being sweet. But they are crazy high in sodium compared to the sweeter options.

Sadly, while the Biscoff is the lowest in calories, and comes in second lowest for sodium and fat, it has no fiber or vitamins, and the lowest amount of protein. I wish they used more soy, to be a better choice as a lunch protein option. But as long as I pack in some cheese, beans, or meat for protein, this is a great vehicle for getting her to eat the whole-wheat, fiber-filled bread!

And yes, I am fully aware of the irony of slathering my meal with almonds and peanuts while trying out this nut-free sandwich alternative.

Wordless Wednesday 2/22/12

Baby E started "talking" (making coos and gurgle noises) and had her first 'social smiles' this week (you know. The ones that aren't "just gas.") Big Sis came over to try and get her to smile some more so I could get a picture of it. No go, but I got a cute one of both my girls together!

My big girl and I went to the ballet together - Fancy Nancy Bonjour Butterfly. So naturally she wanted to dress-up fancy as well. We had a fun time on our "date" but she didn't want me taking her picture after. She even looks fancy walking away!

Tuesday, February 21, 2012

Mini DIY Lunchables-Style Lunch!

Wednesday 2/15/12 - Had nothing planned in the morning, but had leftover meats and cheeses already cut up into squares from a V-Day potluck we had gone to. So made lunches in our EasyLunchboxes to eat in the car (or in the lobby at preschool, in my case,) and to have as snack between school and swim class.
Z's lunch: turkey and ham squares, Mini Saltines, marshmallow treat,
Special K crackers, cheddar and CoJack squares, spinach w/carrots, apples
For a Valentine's Day potluck with one of my moms groups, I brought a meat/cheese/cracker platter. I used my FunBites Cube It! cutter to make mini squares out of the meats and cheeses, to fit perfectly (and cutely!) onto Mini Saltines and the Special K Multi Grain crackers. This particular moms club has mostly younger preschoolers and toddlers, so I figured this size would be perfect for those chubby little fingers! It's kind of neat having one of the older kids in the group, but it means we don't go to as many events.
In a mini paper cupcake liner (from Dollar Tree,) I put a Valentines cupcake-shaped marshmallow treat (also from Dollar Tree.)
For the carrots, instead of cutting them into coins, I cut the grooves to make them look like flowers and left them as sticks, just to change it up.
My lunch: ham and cheese scraps pocket (toasted,) dressing,
mini cupcake, apples, spinach w/almonds and strawberries
For my sandwich, I trimmed off the crusts and filled it with turkey and cheese scraps left over from making the squares for the party (no ham scraps. I gobbled those down when I cut them all...) To prevent having little scrap bits from falling out as I ate it, I pressed the edges together really hard to seal them into a pocket. I also toasted it a little to melt the cheese just a bit to help them stick. (My toaster has wide enough slots for bagel halves, so my pocket sandwiches fit just fine. And saves me from having to put butter on it and get a pan or cookie sheet dirty frying or baking it, like with a grilled/toasted cheese sandwich.)

She ate all the meat and cheese right away, and most of the crackers. She ate the apples and was excited about the carrots being big still. She nibbled on them and the spinach, and nibbled some more after school.
She was not a fan of the marshmallow cupcake, despite her initial excitement about them when I showed her the package. It was kind of peach-flavored, which she didn't like. We'll have to see if the whole package is the same flavor. So the marshmallow had a few licks and nibbles, and then got tossed after I tried a bite as well.

Green BPA-free fork from Dollar Tree, dressing in Tupperware Smidget. Heart-shaped silicone liners imported from China via eBay, but Wilton makes some sturdier ones in red and pink.