Sunday, September 30, 2012

All-Natural Preschool Snacks, September 2012 Week 4

Monday, September 24 through Thursday, September 27
While it's also an added job to remember do each day, I'm kind of enjoying getting to be creative with her snacks, without the self-inflicted pressure to make it cute and themed each day, like with Z's lunches.

Monday
Naturebox Asian rice crackers, shelled edamame beans, strawberries
For the soy beans, I chose a lion pick (to kind of fit the cute animal theme, since my cute seal picks hadn't arrived yet.)
The Asian rice cracker assortment was one of the snacks in our August Naturebox. I love these because the chili crackers aren't all spicy and mouth-burnery like most of the assortments I can find at the store. Plus these are all natural, so I know they're safe!

The Mamegoma box is a hand-me-down from Kidlet at Bento for Kidlet. Squeee!

Tuesday
CoJack cheese, Rosemary Crisps crackers, purple carrot flowers, cheddar Chickadees crackers
I chose to put her snack in a burgundy Lock and Lock box with dividers, even though it holds way more food than she needs. But I wanted to include a wider range of items, so this was the perfect box for that.

To help break up the monotony of orange, I used some new bright colored square silicone cups I found on eBay (imported from China or someplace.) So pretty! Plus they kept the box clean! I only had to wash the lid (and the cheese-filled silicone cup, of course! The others just needed a quick rinse and wipe.)

Wednesday
Strawberry, carrot flowers, edamame, TJ's version of Pirate Booty
The carrots, strawberry, and edamame were left over from her snack the previous two days.

The Paperchase boxes are another Kidlet hand-me-down!

Thursday
Horizon Organic milk box, TJ's version of Veggie Straws chips, Kale Chips, smoked Gouda cheese
Since our new mini 1-tier block box had arrived, I wanted to use it right away! To go with it, I made her Gouda into little Lego bricks too!
After cutting some rectangles freehand, I chopped one in half to make squares. I used one of the eyes from my faces cutters to make the circles (and the assist tool from my CuteZCute to pop them out easy-peasy!) but a bit of straw probably would have done the trick. To get them to stick I just put them all on then smooshed them down. Gouda is softer and creamier than cheddar, so they stuck on real good!
She was extremely excited about her cheese Legos! And as an added bonus, we found a fuzzy caterpillar outside the door at school, and were able to transport him (or her!) home in her snack box! I just offset the lid a little to leave a slice of space for air to get in, then secured it with the strap!

  Lacquer Block Bento Lunch Box 2 tier with Chopsticks and Cold Gel Pink Japanese Bento Accessory Cute Food Pick Animal 10 pcs for Bento Box Lock&Lock Square Bento Lunch Box 3-pcs Set with Insulated Bag

Saturday, September 29, 2012

Butterfly Wafflewich Bento

Thursday, 8/30/12 - We had Z's Little Gym class that morning, so I packed this to be breakfast on the way there and for her to snack on the way home. Plus I had Parent Orientation at her preschool after, so Nana (my MIL, who had come over to watch the girls for me) wouldn't have to worry about feeding her.

When deciding how to cut and position the wafflewich to make it more exciting, I discovered that putting the halves back-to-back looked like a butterfly. So I picked that theme and ran with it!
Green beans, Ranch, strawberries and apples, PB-chocolate almond butter wafflewich, cheese
The little silicone butterfly cup housing the Ranch was a find at my local Daiso store. I only found two packs (my friend at The Keeley McGuire Blog got the other pack!) and have only ever seen them the one time.

I used a tiny butterfly cutter on some Colby Jack cheese and made a zillion of them out of one slice. They're stacked up cleverly, so it only looks like there are four of them.

Since the MOMables strawberry Wafflewiches we'd tried previously were only a moderate success (she didn't like the fruit inside,) I decided to try something a little more familiar. So I used her usual spreads, peanut butter and TJ's Chocolate Almond Butter (Nutella has fake vanilla, which she reacts to. So we won't be getting that in again. Bummer. I like the richer taste of the hazelnuts. Oh well.) A partially split green bean for the body and antennae, and we have a quick and easy butterfly!

I tucked in a Lunchbox Love note, since it went with the theme.
  

Friday, September 28, 2012

Soft Kitty Goes Vegan!

This week Bento Blog Network has a Totally Vegan theme link-up. So I wanted to give it a whirl. I've learned a lot from my friends at Bentoriffic (vegan) and Veggie-Bento (vegetarian.) And still I managed to flub it up!
Soft Kitty, Vegan Kitty
Red grapes, carrots, apples, PB w/flax seeds,
Kale Chips, frozen hummus, tortilla chips.
Pin It
Grape Escape: I was shocked and amazed to note that there is very little in the way of kitty bento picks. I have a few kitty cupcake picks, and some Hello Kitty picks, but this wasn't a Hello Kitty-themed lunch, and I wanted kawaii-cute cats, not just kitty-looking cats. Preferably ones that wouldn't distract from the adorable tortilla chip cats! Plus I was kind of hoping for longer skewers for the grapes. So I just scrapped the cat pick idea and went for some longer bow picks.

14 Carrot Gold: I normally only bother with one vegetable, but since I was aiming for a vegan meal here, I wanted to be sure and include a wider variety of colors and vitamins, since I don't know what I'm doing. I used a v-shaped blade to slice Vs down the sides of a small carrot to make the coins look like flowers.

Apple Dippers: Since she informed me that she doesn't like "cookie spwead" (WHAT?!) I opted for peanut butter for her apples. I loooooove dipping my apples in peanut butter! Plus it gives her some extra protein. And this particular peanut butter happens to be Trader Joe's Valencia Peanut Butter with Flax Seeds. Ooo fawncy!

Kale to the King, Baby!: 1 cup of cooked kale has 9% of your daily recommended calcium, so Kale Chips were a no-brainer choice for a dairy-free lunch. These ones were tossed in olive oil and have Lowry's Seasoning Salt and extra garlic powder.

Something's Fishy...: I got the idea to make frozen hummus shapes from Veggie-Bento. I used a fishy-shaped ice cube mold from IKEA - since kitties like fish! Especially veggie-based fish! This hummus is actually a Tuscan White Bean Hummus from Trader Joe's, rather than a chickpea-based one. I'm not a fan of store-bought chickpea hummus. It has a strange tang. I prefer my recipe (which was published in a cookbook! Toot toot!) 
This white bean one is pretty good too, although very kalamata-olive-y. It thawed fairly quickly.
I attempted to use black sesame seeds for eyes, but they didn't stay in place very well when I added more hummus. Oh well.

The silicone fishy cup came from Christmas Tree Shops... which I don't have around here. But I did a Daiso run and my friend Michelle from Creative Food did a Christmas Tree Shop run and we arranged a hostage exchange!

Soft Kitty, Yummy Kitty: I used my new CuteZCute (you can call it "cute-z-cute" or "cut-ez-cute" - your call!) on a tortilla to make as many heads as I could (five,) then used the kitty face cutter to punch out the features from each one. I tore up the larger tortilla scraps to make a few boring ones for myself. 
I spritzed them with olive oil cooking spray, and sprinkled on some salt and Italian seasoning. (Since Parmesan cheese isn't vegan, under no circumstances did I unthinkingly sprinkle some on. Doh!)
The recipe I found online said to bake at 350 F for 8-10 minutes, but mine were closer to 15-20. I checked every 2-3 minutes after the first 10 though.

CuteZCute cutter set is now available online at Amazon and BentoUSA (allthingsforsale)! Check this link out for more CuteZCute lunch ideas, and link up your own! You can link from sites like flickr, even if you don't blog!
Z had just eaten a large breakfast (a bowl of granola with milk, plus a large bowl of Chobani Vanilla Greek Yogurt,) so I was surprised when she wanted to start working on her lunch when she saw me finishing it to take outside for photos. (Yes. I am frequently seen in bare feet on my back porch, armed with EasyLunchboxes and scrapbook paper, taking photos around a large plastic cooler chest!) And yes. She wanted to eat the hummus frozen. She was quite excited about it, in fact.

I had bought some Silk Almond Milk boxes in assorted flavors for fun alternatives to try at preschool snack, before remembering that almonds are nuts. Doh! But one would be perfect with her vegan lunch! 
Sadly, I grabbed a Horizon Organics box instead, like the scatterbrained ninny I am, and didn't notice until she had already started on her lunch. So no do-overs... Had I any photoshoppery skill whatsoever I would have just edited in the almond milk box and looked super awesome, but I can barely crop and watermark my photos using MSPaint. Oh well.
So the moral of the story is: if your child is vegan, clearly I cannot be trusted to feed them. Act accordingly.

After rearranging her lunch so the "big sister and little sister" grape skewers were nested under a bed of kale leaves, resting their "heads" on carrot pillows, she ate at least half of her lunch. Not bad for her second meal in less than two hours! Those poor kitty chips didn't stand a CHANCE!


Wednesday, September 26, 2012

Johnny Appleseed Day Lunch!

September 26th is "Johnny Appleseed Day" because it's his birthday. To confuse matters, March 11 is also Johnny Appleseed Day... closer to when he died, because it's planting season. Why he gets two days and everyone else gets just one (or lumped into a generic holiday like "Mother's Day" or "President's Day,") is beyond me.
To commemorate (and because someone told me about it in advance enough I could actually do it... and I had enough cheaterly bento tools to make it easy,) I made Z an apple-themed lunch!

Johnny Appleseed Lunch
Cinnamon (in little apple bottle,) Ranch, cheese, Sunbutter-apple butter sandwich, carrots
Chobani Vanilla Greek Yogurt with apple butter, apples, Biscoff spread

Pin It

Read on to find out more about this lunch, as well as what Mama ate! Or check out some other fun Johnny Appleseed-themed goodness. Or both!
(Blogs listed in alphabetical order)

An Abundance of Apples
Apple Tartlets: For the carrots and cheese, I used a mini apple cutter and put them in a silicone apple cup (I had to order these in sets of 24, but I found friends to go splitsies with me!) and a green muffin cup (I couldn't fit two apple cups in there, and this green matched better than the green apple cup!) 
I got some he-uuuuuuge carrots at my CSA farm, and was able to use a regular mini cutter on the carrot coins! Yowza!

Apple Dippers: I put her dips in the mini plastic cups (found at a Korean grocery called H-Mart.) I didn't need containers with lids since I would be in charge of keeping her lunch horizontal. The Ranch was for her carrots, and I thought Biscoff (aka: "cookie spread") would be a fun treat for her to dip her apples, since she would be eating this lunch in a nut-free facility. Peanut butter NOT an option!

Applewich: For her sandwich, I used an apple cookie cutter on two slices of bread, then added Sunbutter and some spiced apple butter from a jamming friend (she wins ribbons and stuff at fairs... or at least did before she got tired of sweeping every category she entered and quit to become a judge! So trust me. This stuff is T-A-S-T-Y!)
Apple Trick: For her Chobani Vanilla Greek Yogurt, I wanted to try something fun. I saw this trick done with colored yogurt over at BentOnBetterLunches, and with applesauce at Lunches Fit For a Kid
Basically you place your mini cutter where you want the design to go, then use a small straw to suck out a layer of the yogurt (or applesauce.) While the cutter is still in place, add your contrasting element (colored yogurt/applesauce, or in this case, apple butter! Jam would be a great option as well!) Spread filling around as evenly as you can before caaaaaarefully removing the cutter. 
Ta-Dah! And you know if *I* managed to not mess it up, it can't be TOO tricky!

In the little apple-topped sauce bottle I put some extra cinnamon for her to sprinkle on. Because she likes it, and as an excuse to include the bottle! *wink!*

I packed a BPA-free baby spoon from Dollar Tree and a reusable silicone Cool Straw for her to stir and slorp her yogurt, respectively.
We have Baby E's "preschool" class at the co-op preschool on Wednesday mornings (it's really a class for the mommies, where the babies get to play and socialize. Or lay there like a slug. Whatever.) Since it's a nut-free facility, I wanted to be sure and pack something safe for Z to eat there. She's having a hard time transitioning to her new preschool class, and has always had difficulty accepting alternate caregivers. So I opted not to put her in Mom's Day Out on Wednesday mornings, and everyone else will just have to deal with her being in the classroom with us.
She's fairly respectful, gentle with the babies, and obedient; so other than a few gentle reminders, she's been able to sit quietly and amuse herself so far. And one of E's teachers was also her teacher the past two years, so it's another familiar comfort in a year full of scary changes. (This Summer her Little Gym moved locations, so instead of us having an easy camp-filled Summer, I got to deal with her having to become comfortable with the place all over again. And the teacher for her weekly class switched to someone completely new at the beginning of the school year. Plus she's in a new pre-K preschool class with all new teachers, mostly all new students, and in a different classroom. And no Mama's-sitting-in-the-lobby at co-op days alternating with her drop-off preschool days to help ease her stress and anxiety.)

We had done a mini Johnny Appleseed unit back when I attempted to do some homeschool preschool with Z a few years back, before I finally came to terms with the fact that she will refuse to learn anything I'm actively trying to teach her. I asked her if she remembered it, and she claimed not to. So I did a brief rundown of who Johnny Appleseed was.
Me: Johnny Appleseed took apple seeds and planted apple trees all across America, so everyone could enjoy them! We live in Washington, which is known for growing apples now. He had to come a very long way to get here!
Z: But there are already plenty of apple trees then. They didn't need him to do all that!
Me: Oh, no. This happened a long, long time ago. Before all the apple trees were here. He planted trees that might be the great-great-great grandparents of trees we have now! (I did a bit about trees to apples to seeds to more trees to apples to seeds, etc. "Like a circle. Yeah, yeah. I got it Mama." Smart ass.)
So it happened a long time ago. He's dead now.
Z: (eyes welling up, lip pouting) He's dead? But I don't want him to be dead! Waaaah!
Me: He did wonderful things and lived a full and happy life! Then got really old. When people get too old, they die. Maybe he had kids, and they had kids, and so on. So in a way he lives on through his trees and his family!
Z: Waaaaaaaaah!

I really wish they'd just teach this stuff in preschool, so I didn't have to flub it.

Scrappy Mama's Gotta Eat
Leftover Sunbutter-apple butter sandwich, cherry tomatoes, medjool date; spinach and
red lettuce salad w/carrot, edamame, raisins, dressing. Dried soy beans, chia seeds
I used the leftover bread from her sandwich to make a half-sandwich for me, and chopped up her carrot scraps for my salad. I left one cut-out carrot coin intact so you could see just how big my carrots are!
My lunch is technically a rainbow, with the Red tomatoes; *Orange/Yellow tomatoes and carrots; Green lettuce, spinach, and soy beans; and *Blue/Purple lettuce tips and raisins. It just doesn't feeeeel as rainbow-y!
*For the purposes of the Food Pyramid's weekly color recommendations, orange and yellow fruits and veggies fall into the same category, as do blue and purple ones.

I put my raspberry vinaigrette dressing in a Smidget, and the Mini Dipper is keeping my dried soy beans (for extra protein and crunch instead of nuts,) and 1 Tbsp chia seeds (for Omega 3s, fiber, and more protein) from getting soggy. Both containers are water-tight.

Since Baby's class is earlier in the day than we're used to being anywhere, I planned for Z to have her lunch to double as breakfast, and packed it the night before. I got Baby's bottles, water and formula for the day measured out and in the diaper bag the night before too. And since I wouldn't have time for breakfast, nor even time to scrounge something up quick, I prepped myself a yogurt and some granola as well, and stacked them in the fridge with our lunches and Z's preschool snack, so I wouldn't forget!
8ish ounces of Chobani Vanilla Greek Yogurt
and 6ish ounces of granola from one of my NatureBoxes!
I used my plastic Ball freezer jars (16oz and 8oz) since they were handy (and make me look like I know what I'm doing!) The larger one holds my Chobani Vanilla Greek Yogurt, and I left room to add the granola. The smaller one has some NatureBox granola that I grabbed from my stash at random. I'm not a fan of soft granola by itself, so I haven't gone through it very quickly. But on yogurt? Yum! I think this was the Agave Citrus mix from April, but I could be wrong.

Z ended up getting up early enough to enjoy a Chobani Champions Vanilla Chocolate Chunk single with some Cascadian Farms Organic Dark Chocolate Almond Granola for breakfast, and finished it off in the car on the way there. And yes. It is as good as it sounds!
So I re-used her spoon for myself, and used the baby spoon I had originally packed to share with Baby E! (before I added in the granola.) [Babies' mouths are born without bacteria - we introduce our cavity-causing germs by sharing food, cups and utensils!] She even managed to cadge a few bites after, but I was careful not to give her big hunks of granola.

I had quite the little baby entourage as I ate my yogurt! Since most of the babies in our class are crawling or walking already, they clustered around me, all up in my grill. Chubby little hands slowly reaching towards my spoon, and little puppy-dog eyes following my spoon's every move. Glance to the spoon. Glance up at me. Spoon. Me. Spoon. Me. Darnit! They learned E's little trick! It was hard to resist them blasting me with the full force of their little Jedi mind powers, but I wasn't sharing!


Tuesday, September 25, 2012

Easy Sauteed Fennel-Carrot-Potato and Baby Mash

I was desperate to find something to do with the fennel that kept coming in my CSA share each week. Mamabelly from Lunches With Love told me about a simple baby food recipe that included fennel, carrots and potatoes. That's been my go-to plan so far with our Summer CSA share - if I don't know what to do with it or we have too much... Feed it to the Baby!
She didn't give me a recipe per se, so I kind of had to fake it and make it up as I went along. Whee!

I sautéed it up and tried it before pureeing. I had Hubby and Z try some too, and we voted on whether to eat it for dinner or go ahead and mash it up for Baby as planned. Read on for the verdict!


Simple Sauteéd Carrots and Potatoes With Fennel
Serves 4-6
Ingredients:
2 lb carrots, coined
3-4 lb total potatoes and/or kohlrabi, cubed
1 fennel bulb, chopped (may include stalks, if desired. Discard fronds or Google recipes you can use them with. Hey, I can't do everything for you!)
1 onion, chopped
1-2 Tbsp butter, separated (or olive oil, for a vegan alternative)
salt to taste
Optional: 1/4 package Firm Tofu, cubed

Directions:
In a large frying pan or wok, melt 1 Tbsp butter and roll it around to coat the bottom of the pan. If at any point you feel you need more butter, add the other Tbsp.

Add kohlrabi (if using;) sauté and stir for 5-10 minutes

Add potatoes, carrots, fennel, and onion. Sauté and stir for 5 minutes.

Add tofu if using; sauté and stir another 5 minutes. Keep going until everything looks and feels cooked properly.
I kept tossing cubes of kohlrabi or carrot into my gob to check for done-ness, since the potatoes and tofu cook up and soften fairly quickly here.

Salt to taste.

DONE! See? SIMPLE!


 Carrot-Fennel-Potato Baby Mash Variant
After cooking, separate out the portion you plan to puree for Baby and add a little cream. (I just used 2% milk, since it's what I had on-hand.)
Mash up using a blender or food processor. Add more cream a little at a time as needed until desired consistency is reached. Freeze any extras in serving-size portions for up to 3 months.

Baby was a fan! She's really into complex flavor combinations. If I leave out the kohlrabi (or do some kind of steam cookery to it first) and make sure to cut everything fairly small (or just do a quick chop in the food processor before serving,) this would be a great finger-food for her after 9-10 months.

The Verdict:
The first time I made this it was aimed at Baby, so I used unsalted butter for cooking. When I tried it, it was soooo gooooood, so I made up a small bowl for Hubby and Z to try. Hubby liked it too, but Z did not. But she doesn't like anything I make that isn't nuggets, french fries, or a PB sandwich of some kind, so don't rely on her opinion too strongly. 
I voted to eat it ourselves; Hubby was noncommital, thinking about all the leftovers we had piling up in the fridge that we could eat instead; while Z and Baby voted to puree it up. I lost. 
So when I got another bulb of fennel the following week, I made sure to stock up on more potatoes and carrots to give it another go! This time I was making it for us, so I used regular salted butter, plus added some firm tofu to make it an entree rather than a side dish. You can add chicken or ham or something if you prefer, or skip it and serve this as an all-veggie side. But I don't like touching raw meat, and I'm too lazy to coordinate sides with my dinners!

Sunday, September 23, 2012

All-Natural Preschool Snacks, September 2012 Week 3

Monday, 9/17 - Thursday, 9/20 2012
Pin It

Monday:
Green beans and carrot flowers, TJ's White Cheddar Popcorn, apples, strawberries
Since we're needing more snack boxes now (because I like having a variety of shapes and sizes... and I don't do dishes every day!) and soon Baby E will need little toddler-sized bentos, I went ahead and bought a Mom Invented Good Bites sandwich box to try. It's too small for a Z-sized lunch, unless I drew a blueprint first for fitting all the food in there! But perfect for a bulky popcorn snack and some fresh fruits and veggies!

As for the box itself, it was easy for me to open and close, but I haven't tested Z on it yet. I'm less concerned about her being able to do it herself, since one of her two teachers can easily just pop her box open, since the snack for everyone else is communal, so they aren't opening 18 kids' worth of individual packages. baggies, and boxes. Do not get me started on the "post-it note" sticker they had stuck on the lid, though. I'm still steamed over how hard that was to peel off... which didn't end up happening as I gave up after 10  minutes of chipping away at it, molecule by molecule.

As part of their "weather unit" at school the teacher planned to have them make s'mores using the sun to melt the chocolate. Since all the grocery store graham cracker brands have artificial preservatives, Hershey's chocolate has artificial vanilla, and marshmallow creme/fluff has fake colors and flavors, I had to get her safe alternatives for everything. (The teacher had offered to buy a safe brand at the store, but I couldn't find any likely-to-find-at-regular-stores safe alternatives for anything but the chocolate, and I didn't want to make her buy a $3 chocolate bar just for Z.)
TJ's graham crackers and chocolate bar, home-made marshmallow fluff
Luckily Trader Joe's had safe versions of both the graham crackers and simple chocolate bars (I needed less-gourmet ones, since the extra fillers help them melt at lower temperatures.) We had to make our own marshmallow creme. I chose a Marshmallow Fluff recipe from the MOMables blog. And had Hubby make it. I cannot be trusted to cook sugar on a stovetop. Unless you enjoy throwing out pans.

The fluff tasted more like frothy honey, since I buy local raw honey (which helps with our seasonal allergies to the local pollens and such) which has a very strong flavor. I don't particularly love marshmallows anyway, so was not a fan, but Z was!
When we arrived at school that day, we were running late as usual, so Baby E and I had to walk her into class instead of them coming to escort her out of the car. The teacher tried to lure her in by saying "Today we're going to use the weather to cook!" The other kids had a slightly different slant on the planned activity... "We get to eat marshmallows! And chocolate!"

The ride home was filled with a play-by-play synopsis of how much she loved her s'mores, and how she only ate the safe "cwackers an' chocolate an' marshmallow spwead" that I had brought for her. "Those were safe, right? Mrs. Wiley said you brought them for me." I hadn't assured her in advance that they would be safe, or even that I was bringing them, since the teacher wasn't sure which day she'd be doing the activity, because it was weather-dependent, and I didn't want Z to be upset that she couldn't have them yet. I just brought everything in on the first day of the Weather Unit, so they'd be available as needed. Good thing too, since the weather was apparently perfect that day! And I'm glad she trusted her teacher enough to eat them. Not that I think she would have turned them down if they hadn't been safe!


Tuesday:  Many Bunnies
Annie's Pizza Snack Mix, edamame, strawberries and golden raspberries, Sunbutter and Fluff sammies
The Hello Kitty box came from the Sanrio store. It has a fork and spoon in the lid, which she didn't need for this snack. But the box was too cute not to use it, and the perfect size for what I wanted to pack! 

I wanted to try her out on the Annie's Homegrown Bunnies Organic Pizza Snack Mix, since I had found it on clearance at Target for her, but had ended up just shoveling it into my own gob so far.
To keep with the bunny theme, I used a mini bunny cutter to make "Fluffer Butter" sandwiches out of our whole wheat bread, SunButter, and leftover homemade marshmallow fluff. We have a LOT of the leftover fluff. Two 16-ounce jars (minus the little bit she used at school on Monday) plus a ziplock baggie. 

To separate all the snack elements, I used my Glitterville silicone cups. They were more expensive than other brands, but such cheerful, vibrant colors. It makes me happy to look at them, and I don't regret the splurge!

Wednesday: 
Apples, carrots, seasoned Kale Chips
I got the Rilakkuma box from Jenn at Bento For Kidlet. Kidlet has outgrown it, so we found it a good home! Squeee!

Thursday:  
Earth's Best Cheddar Crunchin' Crackers, apples, edamame
Round snack box from Target's Dollar Spot, and tall silicone muffin cup from IKEA.


Saturday, September 22, 2012

Allergy-Friendly Savorfull Box and MOMables Breakfast Cookies Variant

When my September Savorfull box arrived at my doorstep, I was ecstatic! This was my first month trying it out, and I could not WAIT! I had seen them on The Keeley McGuire Blog and Creative Food and contacted the company for more info. Savorfull is a monthly subscription service that sends you a carefully selected assortment of trial sized and full-sized allergy-friendly food items (usually peanut-free and/or dairy-free and also gluten/wheat-free.)
While we don't have any food allergies to worry about, the nut-free items would be safe to take to her nut-free preschool for her personal snack, or the boxes often include "ingredients" (flour, baking mixes, etc) I could use to whip up a class snack. [And by "whip up" I mean "flub in some way."]
And everything they choose is artificial-free too, which is what sold me on trying them out!

Little Z was super excited when I told her that this box was full of Z-safe foods. "No fake colors, no fake flavors?" Yep! "Hooray! Can I eat it right now?"

We got a full-size package of Better Batter gluten-free all-purpose flour (nut and gluten free, as well as vegan, kosher, and safe for Feingold I and II diets,) a 1-day supply of MILA Miracle Seeds, a full-size package of Bob's Red Mill Steel Cut Oats (gluten-free and nut-free, but with possible nut contamination warnings,) and a single-serve package of Enjoy Life Vanilla Honey Graham cookies (free from the Top 8 allergens!)


The Savorfull box is only $15 per month, with no added shipping charge! That's a fantastic deal, especially considering that the Better Batter alone retails for around $11!
Are you interested in trying them out too?
Use code BITINGMYHAND for $1 off 1 month, $9 off 6 months, or $20 off a 1-year subscription!


What we did with it:
Z was super excited about the Better Batter... until I explained that it was a box of flour to MAKE cookies, not a box full of cookies! I let her have one of the Enjoy Life cookies instead, and she loved it. I saved the other one to put into one of her school snacks as a fun treat.

Well... I'm not ashamed to admit that other than the cookies, these sat around in my kitchen for a while. I couldn't figure out what to do with the MILA seeds, since I wasn't making smoothies any time soon. And the Better Batter and steel cut oats were ingredients, which I'm not so good with. Baking ingredients, at that. Even worse!
I finally thought to try the MILA seeds on my salad, which was a rousing success. They didn't make my salad feel all seedy, and added vitamins and fiber. Win!


I figured something oatmeal-y would be easier to do than something baker-y, so I started looking for ways to use up the steel cut oats. Crock-pot oatmeal was an obvious choice, but I was still a bit gun-shy from Hubby's attempt a while back. He went to a lot of trouble to find all the fancy ingredients, and seemed to need a lot of prep... and then the results were just "meh."

I found a recipe online for steel cut oatmeal cookies, but I couldn't see that they did anything special to make the oats not so hard and crunchy. So I decided to try the Breakfast Cookie recipe from the MOMables blog.


You'll want to go to the MOMables site for the full recipe, but here is the list of ingredients to get you started, along with notes about my substitutions.

MOMables Breakfast Cookies (with some changes)
Ingredients:
1/2 mashed banana
1/2 c peanut butter or any other nut or nut-free butter. (I used SunButter so these would be safe to go in her preschool snack!)
1/2 c honey
2 tsp vanilla
1/4 c whole wheat flour
1/4 c ground flax seed (or an additional 1/4 c flour)
1/4 c nonfat milk powder or vanilla protein powder (I used unflavored soy protein powder from Fred Meyer's bulk section.) May need to add up to 2 Tbsp water if dough is too thick
2 tsp ground cinnamon
1/2 tsp baking soda
1 c rolled oats (I used steel cut oats. Read below for more details.)
1/2 c dried cranberries or raisins (I used mixed chopped dried fruit. See details below)

Notes:
Other than the oats, I started out putting all the dry ingredients together first and mixing them well, so I wouldn't have to worry about clumps of single ingredients floating around in my cookies! Then I measured and added in all the moist ingredients. Let me tell you. Having a push-cup measuring thingy for the honey and SunButter made this 153 times easier! (When shopping for one, be sure to find one that is dishwasher safe! Unless you enjoy handwashing everything. Freak.)

I'm not a fan of raisins in my oatmeal cookies (I prefer frosting on top!) so I scrounged around looking for something else to use. I was going to chop up some dried apples and white peaches from my June Naturebox, but darned if I couldn't find where I'd put them! So I ended up digging up some de-seeded Sunny Trails mix left over from an earlier box with an assortment of dried apples, cranberries, and tropical fruits. (Z would pick through and just eat the fruits and leave the seeds and nuts scattered around, so I pre-empted her and took out all the seeds and nuts and tossed them into my salads.) To get a full cup of dried fruit mix-ins, I added some Zingy Currants from the April box (I accidentally got two boxes that month, so still have some left!) and some dried cranberries and raisins I keep on hand for my salads.

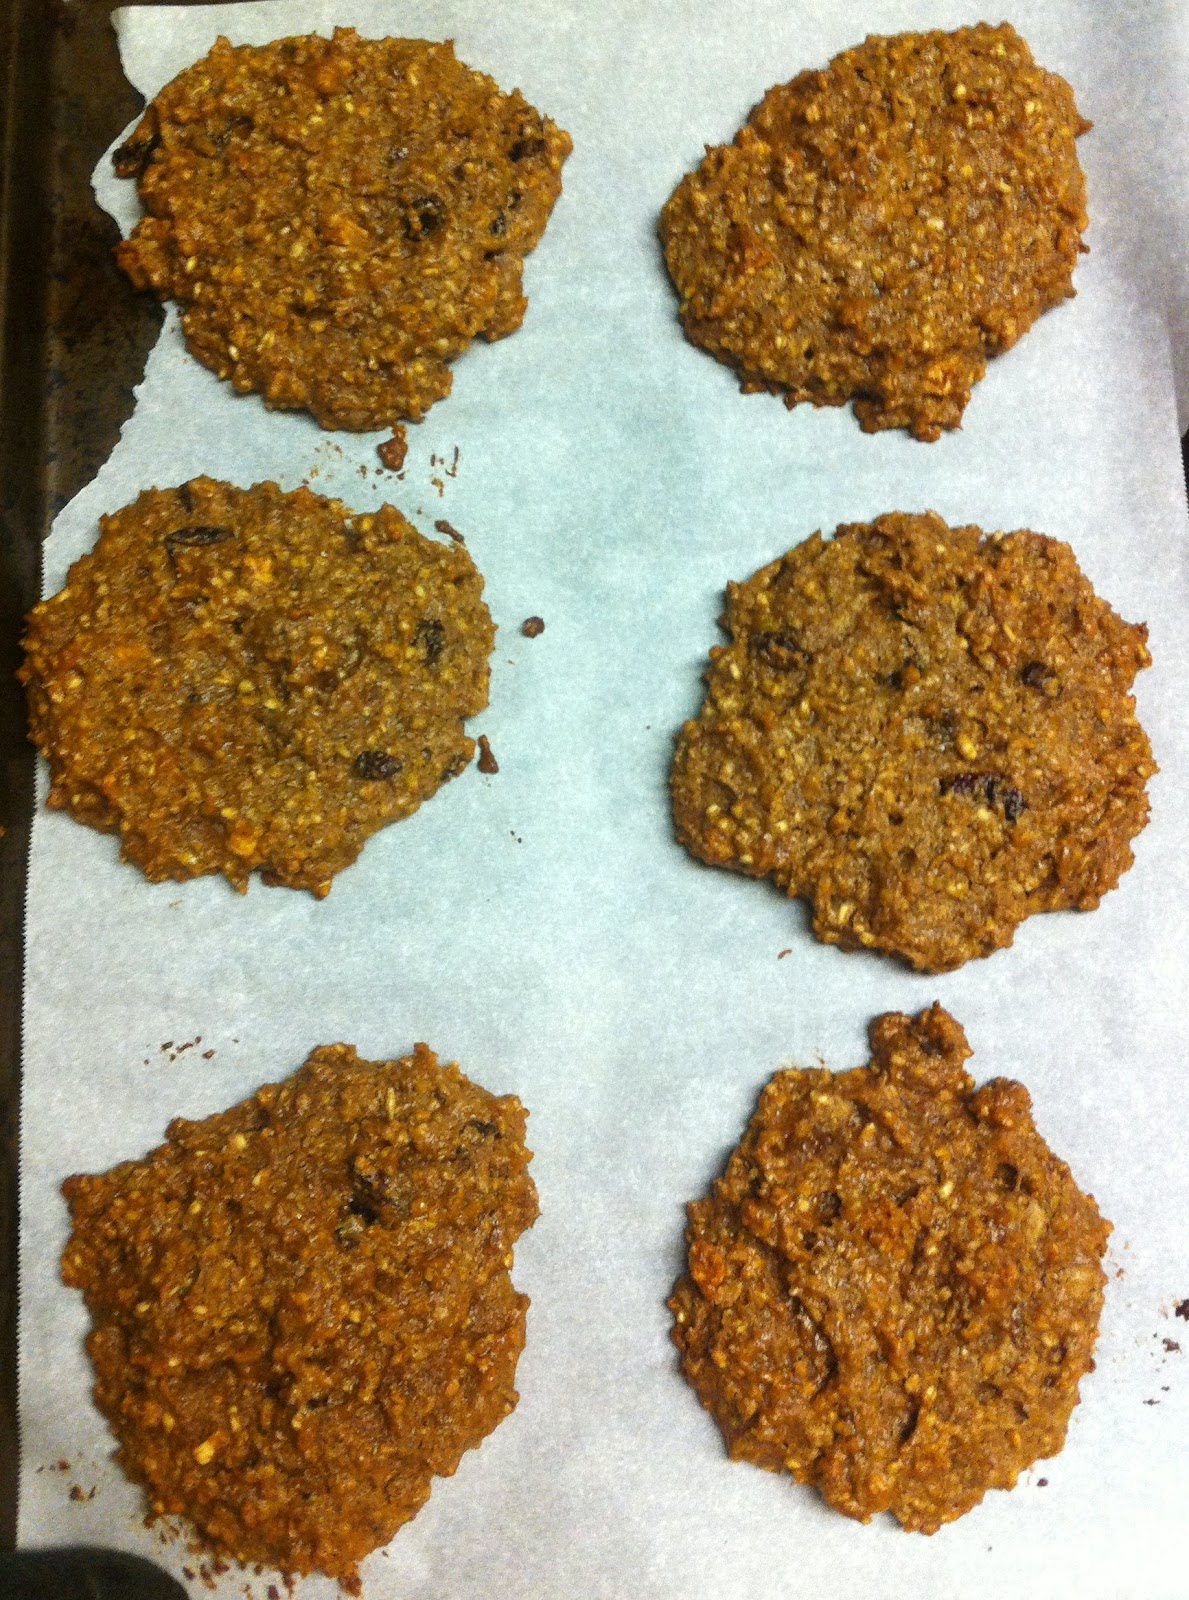
Since steel cut oats need to be cooked about a bajillion times longer than regular oats, I set them to soaking while I got everything else ready. At first I added enough water to dampen them all, but then that seemed like too much, so I drained out the excess. After absolutely everything else had been done, I put them in the microwave, covered, and cooked them on High for 3 minutes. Then I added them to the mixture, scooped and smooshed the dough into cookie blobs, and baked!

I had to cook them an extra five minutes over what the recipe had said, since they didn't seem firm enough to be scooping off and setting on a cooling rack. Probably due to the extra water in the oats.

The Verdict:
They tasted great, but the oats didn't get to soak long enough. The cookies themselves were moist and chewy, and easy to eat one-handed. But I kept finding hard oat nodules in there, making them extra crunchy. Next time I'll either soak the oats for a few hours first (instead of just however long it took me to get all the other ingredients ready,) or boil them per the package directions until almost done.
I liked them just fine, and couldn't stop picking at them while they were cooling. Z, however, did not like them. I'm not sure if it was the crunchy texture, or that fact that they were billed as "cookies" but didn't taste like what she was expecting. She's never had an oatmeal cookie before, so she might have been thinking chocolate chip or Oreo. But she loves cinnamon, so I might try these again, and maybe add in some chocolate chips to entice her.

Some other changes I made: 
I didn't really use a measuring cup to dole out the dough. Or a wet spatula to shape it. I kind of eyeballed it with my mixing spoon and used it to mash and mold them on the baking sheet. Turned out just fine!

Instead of greasing the pan, I used parchment paper. Worked great!

After putting in the first tray of cookies, I decided that it had been too much work, so I figured I'd try baking them in muffin cups! I used a heart-shaped silicone pan and some mini muffin cups, to make school-snack-sized treats. I wasn't sure how high I should fill them, so I went kind of shallow, since they were spreading on the cookie tray and I didn't want them to puff up too much.
I ended up having to cook them quite a bit longer, and kept tamping the puffiness back down while trying to see if they were cooked enough yet. I eventually got tired of it and turned the oven off and wandered away. I kind of forgot about them, so they got a wee bit overdone. Oops. Held together okay, although one crumbled to bits coming out of the muffin pan (I had tried to take them out earlier, and that was the one that decided me they needed to go back in for a bit, so it was kind of doomed anyway.) Another one had a big hunk fall off, but otherwise they all transferred out okay.

 Before:
 After:

*Disclaimer: I received the September Savorfull box for free to try out. I liked it enough I subscribed!


Friday, September 21, 2012

This Lunch Is Making Me Lalaloopsy

Wednesday, 9/12/12 - Z and I needed lunches, since this was the first day at the co-op preschool for E's baby class. Followed by school for Z. I knew Z's class was reviewing the letter "L," so when I asked what she was learning, and she said "L," I foolishly mentioned that "Lalaloopsy" started with an "L." And maybe I could make her a Lalaloopsy lunch someday. Dummy.

I was originally going to make Tippy Tumbelina, since that was her first Lalaloopsy doll, and I had some ballet-themed cupcake toppers I could incorporate. But then we got home and I couldn't find her Tippy doll, only the Sugar Cookie Crumbs (or whatever the name is. I can't be bothered to memorize them all...) that she got for Christmas. Plus Cookie's mouse would be easy to do with a boiled egg, versus Tippy's swan thing. And it got Z to stop moping around asking about her Tippy doll when I told her we'd make a Crumbs doll lunch.

L is for Lalaloopsy Lunch
Hard-boiled egg with carrot and olive details, strawberries and blackberries,
ham sandwich, noodles in cheese sauce, chocolate details, edamame, salt
Pin It

The Mouse Thing: Each Lalaloopsy character has a little minion pet, but I couldn't find the mouse's name, if it even has one.
I hard-boiled one of the free-range eggs I got as a bonus in my CSA share and used a knife to slice slits in the top sides. Two thinly cut carrot coins from a largish organic carrot made the ears, and some bits of uncooked spaghetti noodle and two olive slices made the eyes.
I used some natural food color gel and a toothpick to draw on the facial features, and I tried to draw a tail coming from the back. Meh.
At first the colors bled really badly, so if you choose to color on eggs, here's a tip: blot the liquid off the egg first! Luckily the colors faded into the egg overnight, so it actually doesn't look as bad as it did when I made it!
I used a little DIY funnel out of a scrap of paper to put some pink salt into a little apple-topped sauce bottle for her to add to the egg later.

Lalal-Oopsie: My original plan had been to use my homemade beet dye to color the noodles pink for hair. Easy as pie, right? Bzzzzt! Wrong! I used whole wheat noodles, and they refused to change color! I tried reducing the water and added the whole jar of color, and still nothing!
I was lamenting to my bento buddies on Facebook about my epic fail, and Candy Girl from BentOnBetterLunches suggested I make a cream sauce and just color it. Fine. I was desperate!

Saving Face: For the face I used a biscuit cutter on some bread and ham. I used a mini circle cutter to cut some ham scraps into cheeks.
Lotta Chocolate: My sister loves to melt chocolate to make chocolate-covered strawberries, so whenever I find dark chocolate Dove Promises or bars on super sale, I stock up. Sadly, these all have Vanillin, a fake vanilla flavoring that Z reacts to if she gets too much. I can let the occasional dye-free cupcake slide in an "emergency" (ie: I forgot to bring a safe alternative to her cousin's party,) but not if she also had some recently from, say, Nutella. So we've cut it out of the regular rotation of foods and I'm slowly clearing it out of the house. *sigh* My sister is gonna be sooooo excited to get a grocery-bag full of dark chocolates to make treats with. That she doesn't have to share with us. Since if my babies can't eat it, I try and avoid it as well. (When they're watching, anyways!) She's also going to get my huge stash of Lindt truffles, since they're no good for us either, and I just can't polish them off all on my own!
I did find some dark chocolate Ghirardelli and Lindt bars with no fake flavor though, so we were in business! (Tip: Rite-Aid often has awesome sales on these, like 2/$4 or 2/$5, and often with a +UP reward off your next purchase, making them a fantastic deal to stock up on fancy chocolate bars cheaper than those crappy-tasting chocolate melts!)

I dug around and finally found the Wilton chocolate molding squeeze bottles I had bought to eventually do something with and broke up roughly half a bar to go inside. I like these, since I can just cap them off and keep any leftovers inside to use again next time! If I were really lazy (which I am,) I would just get multiple sets and leave one for each color, once I get some natural chocolate-safe food colors (you don't want to use water-based additives in chocolates. Messes them up somehow!)
I microwaved a mug of water to get it hot, then pushed the bottle into it to get the chocolates to melt. I massaged the sides and put it back in a few times until we were good. Then I made eyes using a mini button chocolate mold. After filling the button molds, I had the chocolate mound up a bit at the back to make them thicker, then trailed off some lines to make eyelashes off the sides. I used a mini bow chocolate mold to make the hair bow. And finally I just squeezed a smile directly onto the sandwich from the bottle. I let my molds sit out on the counter for a while to cool, then popped them in the fridge a few minutes before I was ready to put them on the sandwich.

Hair We Go!: For the pesky noodle hair, I combined some cream cheese, canned parmesan cheese, and milk in the microwave for 30-60 seconds (I forget) until it was all melty, then added a few drops of natural red food color gel and mixed together with the noodles. I don't have exact measurements since I wasn't making a full batch, so I just winged it. Not exactly what I'd had in mind, but good enough!
That'll do, Pig. That'll do.

Well. She LOVED it. L-O-V-E-D it! She made me feel like the bestest Mama in the whole wide world! I really wish I'd gotten a photo of her with it.
She was initially a little thrown by the pink "Mac-n-cheese," but quickly recovered. Tasted okay to me, but it ended up being the only bit of the lunch left over at the end of the day.

Mama Ate A Rainbow!
Tomatoes, blackberries; red lettuce w/purple cabbage, carrots, zucchini, blueberries,
and raspberry vinaigrette. Almonds, dried soy beans, raisins, and chia seeds.

Pin It
My lunch was fairly quick to toss together. I had pre-made my salad base for the week, so all I had to do was add the fruit topping and sides.
The pointy tomatoes came from Unka Seesee's garden, and the smaller roundier ones came from my organic CSA. The blackberries were all u-pick... from my back yard!

Red tomatoes and lettuce, Orange/Yellow carrots and tomatoes, Green lettuce, Blue/Purple blueberries, blackberries, and cabbage.

In my Easylunchboxes Mini Dippers container with the other dried salad toppings, I added in a Tbsp of MILA Miracle Seed (chia seeds) from my September Savorfull allergy-friendly box. (Savorfull offers a monthly assortment of full- and sample-sized peanut-free and/or dairy-free (your choice) and wheat/gluten-free food items, delivered right to your door. Plus no artificial dyes or flavors!) I had worried that they would be too seedy or weird-crunchy in my salad, but they were fine. Will definitely add again! Extra Omega-3s and fiber? Without adding a funky taste or texture? Sign me up!

Who has TIME for all that?!
Including boiling the noodles and eggs (I went ahead and boiled a few more to put in egg molds, so choosing the molds and peeling the extra eggs and putting them in was also part of this whole time-frame;) freaking out on Facebook that my noodles weren't changing color, getting suggestions and then researching easy cheese sauces; settling the baby back down to sleep; and finding my chocolate stash and chocolate squeezy bottle, searching through my stash for something without artificial vanilla flavoring in it, and then melting, molding, and cooling the chocolates; both lunches took me less than an hour to put together. I've spent a lot longer on a lot less before!
If you had leftover noodles from something else, and enough counter space that you could be boiling eggs WHILE prepping the rest of the lunch (currently I'm using the stovetop as my work surface, which means I have to wait for it to cool down first too...) this would go MUCH faster for you! (And if your stuff was organized so you could find it easily...)