Friday, August 31, 2012

Lunch Leftovers - July and August 2012

Friday, 7/13/12 - My July lunches were almost all fun enough to have their own posts, so I saved this one for August. For that matter, my August lunches were pretty much all awesome as well...

A quick and easy lunch before Little Gym camp.
Asian sesame cookie thing, "Everything" bagel thin w/cream cheese,
sugar snap peas, Rainier cherries
She had chosen a little Asian "cookie" assortment at the Asian grocery, with flavorless wafer cookie quarters covered in a crunchy honey-tasting glaze and white or black sesame seeds, or chopped cashews or peanuts. I put one in her lunch to try, and I was surprised to find she hadn't eaten it! Ah well. She didn't eat most of her peas either.

Mama's Lunch
Very Pink Dip,  toasted "Everything" bagel thin w/cream cheese,
strawberries, regular and golden raspberries, snow peas
The berries were from a U-Pick strawberry place we went to with my sister and her kids, and her raspberry patch in her garden. The cherries (in Z's lunch) and peas (in both lunches) were from our organic CSA.

Friday 8/10/12 - Went to the kitchen to make her requested breakfast PBJ (with GWAPE jelly!) only to discover that the brand-new loaf of bread we had bought only 5 days previous, with a "sell by" date of THAT DAY, was coated in mold! Ewww! Turns out Trader Joe's bread is notorious for this. So head's up. If you aren't going to go through an entire loaf of Trader Joe's bread in 2-3 days, store half in the freezer, and the rest in the fridge.
She would accept no substitutes ("Go get MORE bwead!") until I offered her my special "wibbly crackers." The Special K MultiGrain and Savory Herb Crackers are our favorites! I can't decide which flavor I like best. We call them "wibbly crackers" because they have those scalloped edges and I was trying to ask her what kind of crackers she wanted one time, and was describing the different ones we had, and that's the description I came up with: "The ones with the wibbly edges." So it stuck.
She agreed to ham and cheese on wibbly crackers.
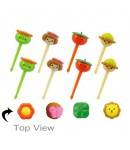
Since the Special K crackers are pretty small, the FunBites CubeIt! squares are the perfect size!

Tuesday, 8/14/12 - We had a dentist appointment for Z, followed by Little Gym camp, and Mama forgot to pack a lunch the night before. So I threw this together in about 3 minutes!
PB-chocolate almond butter sandwich, cheese stick, green beans,
Failure Brownies, apples 

Wednesday, 8/15/12 - Mama had an early-ish doctor appointment, so I made sure we had lunches packed to act as breakfast as well, if needed.
Mini banana, toasted ham and cheese on sandwich rounds, green beans,
blackberries and Bing cherries, Failure Brownies
The Failure Brownies were a failed attempt to alter a zucchini-carrot blondies bar recipe by adding cocoa powder and chocolate chips instead of honey. There will be no blog post, as they were not delicious. Blech. [Update: I lied. Here's the post. Check out the recipe I flubbed up and try it the RIGHT way!]

Mama's Lunch/Family Snack
Pink Dip, sugar snap peas, broccoli, blueberries,
hummus, doggie-bag rice and sweet chicken
I packed this in case we wouldn't be home in between my appointment and Z's summer camp, so I packed a spork for my leftover rice and sweet chicken (from some kind of Asian-style restaurant at the Asian food court at our mall.) But I ended up eating it at home. With some help. Since it was kind of set up like a veggie and dip tray, I laid it out in the computer room and Z and I shared the blueberries, veggies, and dips. Even Baby got in on the act, and licked hummus off a pea pod I kept re-dipping for her. She really loves the savory flavored foods!

Saturday, 8/18/12 -  Snacker box for our day at Nana's. Since Z discovered a love for mustard-covered-pretzels at Nana's (since I had okayed them thinking they were plain pretzels, only to discover they were filled with yellow #5) I packed her a safer version as a special treat. She actually likes it this way more, since she gets the fun of dipping her pretzels as well as eating them!
Green beans, sourdough hard pretzels, mustard, strawberries

Monday, 8/20/12 - MOMables Monday - Thinking Outside the {bento} Box Edition!
Strawberries, carrots, and MOMables Wafflewiches
For the first time ever, I happened to have everything needed to make this MOMables lunch recipe, so we gave it a go! Mama had some for her lunch too! I chose one of her divided plates just to make it more fun, and to keep the foods from rolling around too much.

Baby's Eats
One of Baby's favorites this month was when I made a "mash-up" [har har] of frozen cubes of Cherry Baby Mash, Squished Squash, and Pureed Kale Mash. She also especially enjoyed my Green Mashed Potatoes and some food-processored Collard Greens-Beans-and-Rice Curry.


     Japanese Bento Accessory Cute Food Pick Flower 24 pcs

Foodie Penpals - August 2012 #foodiepenpals

Since I had such fun doing this last month, I signed up for Foodie Pen Pals again this month! I received a package in such speedy-fast time from Katie from The Eight Hour Project that I suspect she is an alien or something. Who on Earth gets stuff done EARLY?

My Loot
Two Leaves and a Bud Tea Company's Assam Breakfast Tea - Mmmmm. I love me some fine, rich, strong tea. With a crap-ton of sugar! Ahhhhhh!

Whole Foods' 365 Safflower Oil - This intimidates me. It looks like it is used for cooking things. I am not skilled. It says it's good for "High Heat" cooking. Maybe next time I try the PF Chang's copycat wraps. Or I'll let Hubby try something ambitious. I wonder if this is good for deep frying...

Brad's RAW Leafy Kale Vampire Killer flavor - I barely got to try these, between my little kale chip fiend and Hubby, who was excited to see ones that weren't over-salted or burnt. Harumph.

Near East Wild Mushroom and Herb Couscous - We had fun making "hug hug couscous" jokes [get it? Hug hug kiss kiss?] all night as we ate our surprisingly yummy couscous. Z even asked for seconds! I avoid "frou frou" foods like risotto and couscous on the principal that they are too fancy and complexicated for me. But this was a snap to make. Seriously. An untrained monkey could have done it. Now that's MY kind of cooking! 
I wasn't sure about Baby and mushrooms, but Hubby and I decided to go for it anyways. Baby E loved this. LOVED IT! If I wasn't shovelling it into her gob fast enough, she'd start fussing. I had to hose her off afterwards, though, since she was coated in little couscous granules!
I even went out on a limb and bought some plain tricolor couscous to try my own concoctions. You know. For kids.

Here are the rules, if you're interested in trying this Foodie Penpals thing for yourself in the future:

-On the 5th of every month, you will receive your penpal pairing via email. It will be your responsibility to contact your penpal and get their mailing address and any other information you might need like allergies or dietary restrictions.
-You will have until the 15th of the month to put your box of goodies in the mail. On the last day of the month, you will post about the goodies you received from your penpal!
-The boxes are to be filled with fun foodie things, local food items or even homemade treats! The spending limit is $15. The box must also include something written. This can be anything from a note explaining what’s in the box, to a fun recipe…use your imagination!
-You are responsible for figuring out the best way to ship your items depending on their size and how fragile they are. (Don’t forget about flat rate boxes!)
-Foodie Penpals is open to blog readers as well as bloggers. If you’re a reader and you get paired with a blogger, you are to write a short guest post for your penpal to post on their blog about what you received. If two readers are paired together, neither needs to worry about writing a post for that month.
-Foodie Penplas is open to US & Canadian residents.  Please note, Canadian Residents will be paired with other Canadians only. We've determined things might get too slow and backed up if we're trying to send foods through customs across the border from US to Canada and vice versa. 

If you’re interested in participating for September, please CLICK HERE to fill out the participation form and read the terms and conditions. 
You must submit your information by September 4th as pairings will be emailed on September 5th!

foodiepal stamp2 Foodie Penpals

Thursday, August 30, 2012

In the Doghouse

Wednesday, 8/1/12 - Not sure what happened, but the photos of this lunch were hiding somewhere out of chronological order in my August folder, and then had jumped to another folder when I went looking to belatedly post about this one! Weird. But I found them finally. Hardly worth all the hullabaloo though!

PB-something sandwich, champagne grapes, broccoli w/carrots
I chose the dog Lunch Punch as a nod to Animal Week at Little Gym, and as I recall I banged this lunch out pretty quickly before we headed out. Maybe five-minutes start to finish. Well, okay, ten-minutes if you count sorting through my sandwich and veggie cutters, plus staring into the fridge and making a zillion trips back and forth for each ingredient.
I had thought about doing dog-bone cheese shapes, but apparently it fled my mind, as there's a distinct absence of cheese here!

I can't remember what's in the sandwich, other than peanut butter and either Nutella (if I'd still had any left back then,) or chocolate almond butter. Or possibly honey. But if it makes you not judge me feel better about this being a balanced lunch with all the food groups represented, you can pretend it was (uncured) ham and cheese. ☺
Orange and yellow carrot coins (organic, along with the broccoli, from my CSA) were cut with a flower veggie cutter.
Mama's Lunch
Lettuce salad w/raspberries, blueberries, carrots, raisins, almonds and
Raspberry Vinaigrette dressing. Pink Dip, sugar snap peas, broccoli
Woof?
Since Z's been demanding that everything in her lunches fits the "theme" (while often I'm just tossing in whatever will go bad soonest!) I had to come up with answers on the fly.
"What are the grapes supposed to be, Mama?"
"Uh... dog poops. Er, no wait. Dog kibble. Yeah. Dog kibble."
"And what about the broccoli and carrots?"
"Uhh... Trees and flowers, since dogs like to pee on them. I mean play outside in the garden."

She gobbled down every bite. And decided that some of the grapes were, in fact, pretend dog poops.


Wednesday, August 29, 2012

Bacon-Egg-and-Cheese Veggie Breakfast Muffins

I made these a while back, but didn't bother with bacon then, which was a huge mistake. And since I am stuck with was blessed with several pounds of broccoli from my CSA share over the past few weeks, I thought I could use some up in these egg muffins again. Since I was adding bacon, I kind of went by this recipe as a cooking guide, since you don't want to mess with bacon!

This is also a great way to use up scraps of cheese and veggies from making shaped foods in lunches. Lunch meat scraps are a good addition to or substitution for the bacon as well.


Pin It

Bacon-Egg-and-Cheese Veggie Breakfast Muffins
Makes 12 (6 servings)

Ingredients:
12 eggs
12 ounces bacon, cooked and chopped (see below for an easy way to cook it!) I used uncured bacon from Fred Meyer (Trader Joe's carries it too!) to reduce the nitrates.
2 cups grated cheese (Dealer's choice.) I used half Colby Jack and half Medium Cheddar
up to 2 cups chopped or grated veggie fillings (broccoli, spinach, zucchini, etc.) I used broccoli, but just the tops.
1 tsp salt or Lowry's or another seasoning salt blend.
2 tsp Italian seasoning or dried herbs of your choice
pepper or other seasonings to taste. Chives or green onions work well with these, I hear.

Directions:
Pre-game Show:
For my favorite way to cook bacon (as it's practically effortless, and I get a more uniform result with fewer bacon splatter burns,) I make "bake-en!"

Step 0.1: Line a baking tray or casserole dish with aluminum foil, going up the sides if possible. This isn't necessary, but makes for easy clean-up! Lay out strips of bacon on foil, with as little touching or overlap as possible.

Step 0.2: Place tray in cold oven, then set oven to 400 F. Set a timer for 15-17 minutes. Wander off until timer goes.
During this step or the next, go ahead and set up another baking tray covered in paper towels for when the bacon comes out. Might as well find where you left your hot mitts last time too. You'll want those handy. Trust me! While the "hot mitt" rushed to you from your child's play kitchen is cute and you appreciate the assist, it isn't actually safe for removing hot items from a real oven.

Step 0.3: Start checking every 2 to 3 minutes after initial timer goes off. Cooking time varies based on how fast your oven heats up, how crispy you like yours to be, as well as the thickness of the bacon. Most bacon should cook at around 17-20 minutes total. My thick-cut took closer to 30 minutes.

Step 0.4: Using tongs or a spatula (NOT your bare fingers!! Yeowch!) remove bacon from the hot tray and lay it to drain on the prepared paper towels. You want to do this fairly soon, since the hot pan and oils will continue to cook the bacon.
Pour the excess oil into a heat-safe container, such as a glass jar, ceramic mug, or washed can. You can strain out the crunchy bits if you like, if you plan on re-using the oil for frying. Yum! Or use a can or en empty milk carton if planning to discard. (Let the oil cool before dumping it in the trash can though. You don't need molten-hot oil spilling out and melting its way through everything!)
Step 0.5: Fend off husband and daughter, who don't care that you're trying to make breakfast muffins. They just want your bacon, and will stop at nothing to get it! They cannot be trusted! Notice the missing strip of bacon in the above picture?

The Main Event:
Preheat oven to 350 F
Step 1: Divide chopped veggies evenly into twelve muffin cups (ungreased if using silicone pans; lightly greased or with muffin cups for a metal pan.) If using chives or green onions, disperse them here.

Step 2: Divide chopped, cooked bacon pieces evenly into the twelve muffin cups.

Step 3: Divide grated cheese evenly into the twelve muffin cups. (Mix together first, before dividing, if using a variety of cheeses.) Set muffin pans aside.

Step 4: Whisk eggs and any seasonings (salt, pepper, Italian seasoning, or whatever herbs you decided to toss in there.)

Step 5: Ladle or pour sloooowly into muffin cups, letting the egg settle as you go. Fill them up to 3/4ths full (or if your fillings go higher, you can fill to the tops of your fillings, but your eggs may puff up and ooze around on top of the muffin pan. Ahem. Like mine did.)
Tip: I poured my egg mixture into a 4-cup measuring cup which made pouring easy. I would have mixed it right inthere, had I thought about it before dumping them in a bowl. 
This tip also works well with pancake batter. I mix it up right there in the cup and avoid a dirty bowl! Get one with a lid, and you can easily save extras to use within the next few days.

Step 6: Bake at 350 F for 25-35 minutes, or until puffy and starting to brown on top. Remove from oven and let cool for about 15 minutes. You may need to gently use a butter knife to separate the eggs or papers from the sides of the muffin pans.
Tip: When using silicone pans, I find they're easier to handle on a baking tray. I don't have to use both hands to keep the flexible silicone pans level, and I don't have to worry about the cups bending or sliding between the bars on the oven rack as I try to find the right spot to set it down, spilling my eggs everywhere!

Serve immediately, or reheat one for 1-minute (two for 2-minutes, four for 3-minutes, etc) in the microwave. They last at least a week in an airtight container in the fridge (well, they would last, if you don't gobble them all down before then!) or longer in the freezer (pair them up in cheap zipper baggies, then seal those in a larger freezer-bag. Toss a bagged pair in the fridge to thaw whenever you cook up the pair you have sitting in the fridge.

The Verdict
Yummy, but strange. Maybe I used too much of the broccoli stems, but the broccoli flavor was very overpowering this time. I kept expecting to taste spinach, so I think I'll try that next time. I really like spinach and bacon omelets (when the spinach is chopped fine enough and mixed in with the eggs. I hate wet sloppy leaves sliding out of the fold and hitting me in the chin! Blech!)
And because three of my bacon slices got swiped, I only had half a slice per cup, instead of 3/4ths of a slice per. (I had the thick-cut bacon, so there were only 9 slices.) Minus the burnt tips, which I cut off and ate. *burp* So they weren't as bacon-y as I would have liked.
And since I now have some chives and green onions, I might try to add some of them too. I wasn't sure if the Italian seasonings would be too much, so I skipped them this time.

(heart-shaped pan was on clearance after Valentine's Day at JoAnns.)

Tuesday, August 28, 2012

Lunchbox Love Notes Giveaway (Ended)

I've been seeing these Lunchbox Love notes from Say Please around the blogisphere for over tow years now, ever since I started making fun lunches for Little Z. Since she can't yet read, and I'm rarely sending her off with her lunch without me, I hadn't seen the need for them for us yet.
But they're still a great idea for everyone else. So when I wrote up my Top Five School Lunch Essentials post, I made sure to include Lunchbox Love notes. Which inspired me to contact them about doing a review or giveaway, or something. Fun facts are still fun, even if Mommy has to read them to you. And love notes from Mama don't mean any less just because Mama's right there next to you when you get them!

And if your child can't read yet, but takes a lunch to preschool or daycare, they can be even more fun, since then the whole class can enjoy as the teacher reads the Fun Fact out loud for everyone!

I do my best work (in my opinion) when given an assignment, inspiration, or theme idea, so many of the Fun Facts about animals inspired me to do themed lunches around them. (In fact, it was hard deciding which ones to do first!)
Grapes, cheese, chocolate, hummus, *sandwich, green beans
This fun fact opened up a discussion about bullfighting and matadors. We've watched So You Think You Can Dance since she was first waddling, so we also discussed how one of the dances they showcase, the Paso Doble, is based on a bullfighter and his artistry with his cape.
And it just so happened there was a cow-theme that day at Little Gym's Barnyard Bonanza camp! I am just that good!


My only complaint, and it's a minor one, is that the notes aren't designed to be reused. Granted, most kids throw out their trash and recycling, so the notes would go with. But I'm training my child(ren) to "pack it in, pack it out." Bring home any trash, leftovers, whatever. So I can see what they're eating (or not eating.) And hopefully I won't accidentally lose any bento picks or silicone cups (or even worse, a retainer!) to a garbage can along the way!
But since the notes are just printed on fancy card stock, they pick up berry juice stains, peanut-butter-oil smears, moisture from the food in the box, etc. So I'm thinking of finally getting my laminator out of its package and putting it to work! They won't last forever, but I can see using them at least several more times before they're done!
Maybe trading card sleeves will work... Then I can still compost/recycle the cards when done... Hmmm...

Greek yogurt, jellybeans (in chickie container,) grapes, cinnamon
(in bottle, for yogurt,) *sandwich, strawberries, beans, broccoli
The love note said something like "I love you just because you're you." "Really, Mama? Is that twoo?" Cynic!

When I read the chicken fact out loud to Little Z, I tried to help her put it in perspective. "Think of all the people you've ever met, or seen. There's more chickens in the whole world than that! For every single person you see, there is more than one chicken!" So then she extrapolated upon that, "And when you die, your chicken dies too." Hrm. Not exactly where I was going with that... 
Then we talked about how there had to be a bunch of chickens, more than one per person, since we've each eaten more than our one chicken. "But only the ugly ones. We don't eat the nice, pretty chickens." Oooookay...

*I would like it noted that I purposefully made these sandwiches with nut-free butters to make them school-safe (and to test her out on a new spread.) The cow lunch features Wowbutter, and the chicken uses SunButter. She didn't mention anything about her peanut butter tasting funny for either of them! I used honey instead of jelly (because honey complements them better, in my experience) or her usual chocolate almond butter (because, helloooo nut-free here!)

You know you want some now! So head on over to Say Please and choose from their amazing assortment of Lunchbox Love notes! They have notes for all ages, but also sets aimed at kids or teens. They have ones for your sweetheart. They have ones for camps. And various holiday-themed ones. Just an amazing assortment of ways to show your love! Each volume contains 12 colorful cards, with a message on one side and a fact on the other, in a re-usable plastic card case, for just $2.99. Or you can get bundle sets for an even better value!
Use my code, BITING, to get 15% off your order! Even yesser!

But while you wait for them to arrive, why not try and win some?

Pin It

a Rafflecopter giveaway


**Disclaimer: I received four free volumes of Lunchbox Love notes to review. I still do my Happy Dance when I'm flipping through them deciding which one to use next! I need to clear more Happy-Dancing space on the floor in the kitchen...

Sunday, August 26, 2012

Leftover Garlic OmNomNaan Mini Pizza Faces

Friday, 8/3/12 - Hubby's work was taking the afternoon off to go watch the Blue Angels fly over Puget Sound for Seattle's Seafair, and family was invited. He offered to take Z with him all day, so I could go on a little road trip to visit a friend!

Trader Joe's frozen Garlic Naan Bread is hands-down the best store-bought naan I've ever had. It even beats that at most of the restaurants I've been to. (There was one place that has since closed down that we went to a lot while I was pregnant with Z, and they had the best garlic naan in the history of ever. We'd go for their buffet, and they'd just keep bringing me basket after basket! Haven't found anything yet that measures up, but this one is pretty close!)

While we were munching on our garlic naan and I ate my Trader Joe's (frozen) Butter Chicken with Rice (pretty good. A wee bit spicier than I'd like though,) I was trying to plan out her lunch for the next day, to take to work with Dadda, in case she didn't like whatever they were having catered. I recalled seeing naan bread pizza on Bentobloggy before, so I asked Z what she thought of the idea. She loved it. I asked if I could make little circle pizzas with my biscuit cutter on some of the leftover bread and make little smiley faces with olives like I did on her cauliflower crust pizza. Yes. But she wanted OUR faces! Oy!


Leftover Garlic OmNomNaan Mini Pizza Faces
Ingredients: (amounts vary based on how much leftover naan you have to work with)
Pre-made garlic naan leftovers, cooked per package directions
Pizza or spaghetti sauce - amount varies based on how gloopy you like your sauce. I added a little over a teaspoon to each. I like my sauce baked into the crust.
Grated mozzarella
Assorted toppings: grated cheddar, olives, pepperoni or ham cut into facial feature-y shapes, veggies, etc.

Directions:
Step 1: Cut your bread. You can use a biscuit cutter to make little rounds for faces, or just leave your bread as-is and cut with a rotary cutter into lunchbox-sized slices later.
Step 2:  Add sauce, cheese, and toppings.
I used some of my spaghetti sauce with the Bok Choy puree mixed in for added nutritional punch. Topped in mozzarella. I added cheddar cheese and olives to make the details. Which is why the Mama pizza looks like MY mom! I should have used purple yam shreds for my longer brown hair. Oh well. I was especially pleased with my olive glasses, though.
Left to right: Dadda, Mama, Z, Baby E
(Note the little mustache and goatee on Dadda!)
Step 3: Broil 5 mins until cheese is bubbly

They're the perfect size for lunch!
Leftover Naan Pizzas, strawberries and raspberries (and our last cherry,)
Purple Yam Sweet Potater Tots, ketchup
Naturally, she didn't touch her lunch, not even for breakfast on the way there. Bleah. And refused to eat the faces at all, ever, because they were too special. Urg! So I reheated them for myself. They were soooooo tasty!

Leftover Leftovers!
To reheat pizzas, turn oven to 350 F. Immediately put pizzas in on a baking tray or straight onto the racks, if they're big enough. They should be done a few minutes after oven reaches 350. (This works great for any kind of pizza reheat, by the way.)

Thursday, August 23, 2012

It's a Zoo In Here Bento

Thursday, 8/9/12 - Animal Week at Little Gym! This day we had Z's class, then Baby E's class, then camp for Z, so she needed a lunch to eat while Baby and I were in class.

It's a Zoo In Here!
Sandwich, dye-free gummy penguins, organic green beans and raspberries, frozen yogurt shapes

Pin It
Cool Treats: Mostly to go with the theme, I added in a few dye-free Trader Joe's liquid-filled gummy penguins in a mini muffin cup. They're her favorites, since she's a fan of chewy (just like her Mama!) with a burst of juice inside just for fun.

Picking Berries: I got some zoo animal cupcake picks and chose two that weren't represented elsewhere in the lunch to go with her raspberries in an attempt to keep her fingers clean. Fat chance!

FroYo Hippos (and Lions): Since I actually planned this one ahead (*gasp!*) I was able to scoop some Chobani Champions Verry Berry yogurt into a zoo animal ice cubes mold and freeze overnight to include in her lunch. I packed a spoon (and straw - she loves "drinking" her yogurt) in case they thawed by lunch, but kept the lunches in my EasyLunchboxes insulated cooler bag with an ice pack in an attempt to keep them frozen for her.
I got the idea to make these from The Keeley McGuire Blog. Saw some other fun uses for my silicone molds from a guest post by Veggie-Bento, so I might be trying hummus next!

Bear With Me: For the sandwich, I used a circle cutter for the head. I used a smaller one for the ears and snoot, and used the head cutter to cut curves into the ears to make them fit better. Since one of the sandwich slices was a heel turned fluffy-side-out, I made sure to cut the snoot out of the scraps for that and flipped it to make a contrasting circle. Raisin eyes and nose, and everything secured with uncooked spaghetti noodle bits.

Mama's Lunch
 TJ's dark chocolate PB cups; peas broccoli, green beans and Pink Dip,
red plum, Trader Joe's Parmesan Garlic Herb Pita Chips
I looooove Trader Joe's Mini Dark Chocolate Peanut Butter Cups. Blows that mass-market brand right outta the water! And no fake ingredients, so I don't have to look shamefaced as my daughter lectures me on the evils of fake colors and flavors if she caught me eating one. I can let her eat one too! She can now read the name "Trader Joe's" on packages, since she asks me to check labels for her before she'll eat things, even if I think know they're "safe." I certainly want to keep her engaged and feel like part of the solution, so I'll paraphrase the ingredients list for her, or if it's from Trader Joe's, have her read the name at the top of the packaging. (Anything with the Trader Joe's name on it is free from artificial ingredients!)


My Bento Toolbox:
Please note that EasyLunchboxes are temporarily SOLD OUT! 
(Something about weather crises and an unexpected upsurge in popularity.) 
Don't go all Apocalyptic and start rioting or anything though. They're due back late September! You can click my link and add them to your wishlist!
(Although I am finding I'm ready to go all primitive on anyone admiring my boxes, now that they're a "scarce" commodity! RAWR!)
*Update - Back in stock!
     

Wednesday, August 22, 2012

Easy Curried Collard Greens Recipe

Little Z chose Collard Greens one week as the "1 Bunch Greens" portion of our CSA share. Ugh. I didn't want a Southern-style version, based on nothing more than a gut-feeling. I was intrigued by this recipe that sounded different. But it looked like a lot of hassle, and several ingredients I wasn't interested in. So I used it as an inspirational springboard and made my own recipe.

Curried Collard Greens
Prep time: 10 minutes. 
Catch Up On Facebook Interact With Children Time: 35 minutes
Serves: 4-6* 
*depending on whether the older child left you any of her bento, and how much baby food you were able to scrape out of the bottom of the jar for your own lunch that day. Really, this only served 3 of me, but I had seconds both times I ate this as my meal, then shared the last helping with Hubby. Buuuurp!
Ingredients:
1/2 lb collard greens
1 Tbsp water
1 c uncooked brown rice
1 cup water plus water per rice directions (mine called for 2.5 cups water for one cup of rice, so 3.5 cups water total)
1 can beans, rinsed and drained - black, white, red, or garbanzo (you could use the bean water and add that much less regular water, but it contains a lot of the extra sodium added to the beans, so I dump mine out.)
1 bulb green garlic, minced or 3-4 tsp minced garlic
1/2 onion, diced
2 tsp curry powder
1 tsp ginger
1 tsp salt
Optional - juice from 1/2 lemon or lime (or roughly 1 Tbsp juice)
Collard Greens
Directions: 
Step 1: Remove stems by cutting in a V along the stem up each leaf. Chop leaves into desired sized pieces.
You can just cut into strips then crosscut those a few times, or whatever-size pieces you'd be willing to eat. I don't like wet leaves flopping off my fork and slapping me in the face, so I went small.

Step 2: In microwave-safe dish, add collard greens plus 1 Tbsp water. Cover and microwave on High for 5 minutes. [Start steps 3 and 4 while cooking.] Set aside.
 
Step 3: While the greens are cooking, pour remaining water (1 c water plus water per rice package directions - my brown rice called for 3 c water per 1 c rice, so I added 4 c total) into large pot. Add spices - curry powder, ginger, salt; mix well.

Step 4: Bring water to a boil. Add rice first, then the beans, onion, garlic, and cooked collard greens. (Squeeze in juice from 1/2 a lemon or lime to help tone down the greens taste, if desired.) Turn to Low (2-3,) cover, and let simmer for 35 minutes.

This dish was so simple to make, even I thought it was easy! And usually for me, boiling water is kind of a hassle.

The Verdict
I wish I'd gone with my gut and tossed the greens in the food processor first. I'm not a fan of the texture of wet cooked greens. They tasted fine; in fact, we loved the flavor of the dish overall. We gobbled it all down over two days. (Well, okay. It was mostly me. Hubby stayed out late the night I made it, and then I ate more for lunch the next day. I saved him some to try when he got home, and he ended up splitting that with me as well! Sucker!) But I wasn't a fan of how the moist hunks of slimy leaf felt in my mouth. 
Feel free to add more seasonings, to taste. I felt it could have used some more curry powder, and I added salt to mine, but Hubby thought it tasted just fine as-is. 

This was also somewhat tasty at room temperature. The texture of the leaves was the only thing ruining that for me. And since I was home alone with both kids for the most part when I was eating this, I pretty much only got to try a few bites of it hot each time, before it hit room temp. 

Baby Love
This also pureed up nicely for the baby. I added a little extra water and tossed a few ounces in the food processor. She LOVED it! We sat on the floor (well, I sat on the floor and she sat in her baby rocker) eating/being fed our Curried Collard Greens together!

Alternate Options
If you don't like using a microwave, you can use a steamer or stew the greens on the stovetop for a while first. Or this could easily be adapted to a slow-cooker by just mixing the seasonings in with the water first, then adding in the rice and everything else after (no need to pre-cook the greens,) and cooking on Low for 4-6 hours or High for 2-3. 

You can also choose to use the water in with the canned beans, and leave out that amount of regular water, but much of the sodium in the canned beans is stored in the water, so I like to rinse it out, even if it means I'm losing some of the nutrients. Soaking dried beans overnight the night before solves this problem, and you can save that water to use!
The beans and rice together give this a complete protein, but this would still be yummy with chicken instead of beans, and potatoes instead of rice.

A can or two of coconut milk instead of a cup (or two) of water would add some depth and creaminess to the flavor as well, and enhance the curry flavor.

And feel free to saute the onion and garlic first to do whatever that does to enrich the flavor. I'm far too lazy. And ugh. More dishes to wash!

Tuesday, August 21, 2012

That Rabbit Belongs to Emily Brown @cressidacowell

Thursday, 8/2/12 - Found at a used book store for $3 and bought simply because it involved her favorite animal- a bunny, That Rabbit Belongs to Emily Brown has quickly become one of her favorite bedtime reads. (By Cressida Cowell, the same author as How to Train Your Dragon!)

The Queen wants Emily's stuffed rabbit, Stanley, but he is NOT for sale! The queen tries a variety of bribes, but finally resorts to stealing "Bunny Wunny." The palace staff cleans him up and fixes his flaws, and then the queen is unhappy because he isn't as fun-looking or happy as he was with Emily. Emily goes to rescue Stanley, and tells the Queen her secret - love your toy, and make it special in your own way. And then she and Stanley go home and live happily ever after.

So for fun, I threw together a quickie themed lunch!

"That Rabbit Belongs to Emily Brown" Bento
Strawberries, cheese, Annie's Gummy Bunnies, ketchup,
Purple Yam Sweet Potater Tots, PB-chocolate almond butter sandwich dumplings
Stanley/Bunny Wunny: I used a mini bunny face cutter to make cheese bunnies. Bunny-shaped Purple Yam Sweet Potater Tots with ketchup, for more Bunny-Wunny fun. And as a treat, some Annie's Bunnies Tropical Treat Fruit Snacks.

Emily Brown and the Queen: I used a biscuit cutter to cut bread circles, then I flattened it a little, put globs of peanut butter and chocolate almond butter in the centers, then used a dumpling press to fold and seal the bread into dumplings. I used little head picks to make the dumplings look like dresses on the Queen and Emily Brown. (Emily is the little boy-head pick with the yellow hat, and the queen has the pink bow in her hair. Not that it matters.)
She loved her sandwich dresses, and spent a lot of time playing with the picks. She even used the sticky Annie's Bunnies (they got kind of tacky to the touch overnight after sitting in the compartment with the moist strawberries) to form a body with arms and legs to make her own little girl. She mostly used the picks to eat the strawberries after that.
Photo by Little Z
In the interest of full disclosure, I will admit I started out with no theme in mind, but wanting to use my new dumpling maker to make the sandwiches. Then I thought about using my new face picks to make them into little angels or something. And since I already had the bunny tots, I went with a rabbit theme for the rest. As I was packing it, I realized it would go with the book I overheard her Dadda reading to her for story time the night before!

Mama's Lunch (and Snack!)
Snack: broccoli and peas with Pink Dip. Lunch: spinach salad w/raspberries, blueberries,
raisins, almonds (in little green box,) and raspberry vinaigrette (in Smidget.)
Sunny Squash Greenies, Cheese scraps, Trader Joe's Parmesan Garlic and Herb Pita Chips


    Japanese Bento Accessory Cute Face 8 pcs for Bento Box Japanese Bento Box Accessories Sauce Container set of 4 Animal Mayo Cup