Showing posts with label recipe. Show all posts

Monday, November 2, 2015

Winging it with KitchenIQ - Lemon-Rosemary Zoodles with Roasted Carrots

I participated in an Influencer Activation on behalf of Influence Central for KitchenIQ. I received promotional items to thank me for my participation.

I was originally going to make this Cilantro Lime Chicken zoodles recipe from iFoodReal, but the grocery store was out of cilantro and I was too lazy to go across the street to the other store. So I grabbed some rosemary and figured I'd wing it... I was also going to make Garlic Roasted Carrots from Damn Delicious, except that when my guests voted for garlic instead of cumin for the zoodles, I didn't want to garlic up the carrots too. So I just used seasoned salt and called it good! Unless my friends were just trying to make me feel good, both dishes were a hit!


First off, let me start by telling you about my knives. We have old knives. From before my husband and I met 19 years ago. And they have been sharpened approximately once a never. I am just used to hacking and forcing my way through fruits and veggies, and maybe lopping off a bit of skin along the way. So I was excited to try KitchenIQ's Edge Grip Knife Sharpener (it's a bestseller on Amazon!) It didn't really come with instructions, and I clearly have not been honing my knife-sharpening skills [see what I did there?] so I had Hubby sharpen the knives for me! Besides, I'm better at taking pictures than he is. And also clearly better at weaseling out of doing prep-work! Hahaha!

My guests and I were really impressed with the Edge Grip Knife Sharpener. I tried cutting one carrot before sharpening, for comparison, and they saw how hard it was. After sharpening, my knife went through those carrots "like buttah!" It was surprisingly easy to use the Edge Grip's unique design to sharpen my straight-edge double-bevel knives.
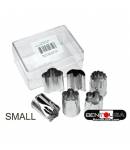
There are actually two stages of sharpening in the one unit, and it pretty much worked the way I had guessed (but don't tell Hubby that I could have done it after all!) There's a Coarse sharpening slot with carbide blades for quickly sharpening dull or damaged knives with just a few pulls. The Fine slot has ceramic rods for finishing and polishing the edge, or to touch-up an already sharp knife. And thanks to the Edge Grip Bottom, the whole thing stayed stable on the counter top without sliding around. All that, and it's small enough to store in my cutlery drawer!


We used the Potato Tool to scrub and peel the carrots. And by "we," I mean my husband. This tool includes a scrub brush for cleaning potatoes and other veggies, a straight-edge peeler, and a paring knife tucked safely in the handle. Both the peeler and paring knife have non-stick stainless steel-coated blades, and the paring knife can be sharpened using the Edge Grip Knife Sharpener!
The ergonomic soft-grip, non-slip handle made it very easy to use, and it was handy being able to scrub each carrot then just rotate the tool to immediately begin peeling. Plus it's top-rack dishwasher safe! Bonus!


Since I was provided with extra Better Zesters to gift to my guests, I let Hubby have a break from doing all the labor and had my friends zest the lemon for us.
The Better Zester features a stainless steel V-etches zester blade, which makes it perfect for zesting all kinds of citrus fruits. Would probably work great for grating parmesan too, but I'm lazy and buy it pre-grated! The non-stick food-safe coating allows for smoother zesting and easier clean-up, plus it's dishwasher-safe! But our favorite features were the plastic cover to protect little hands from the blade while rooting around in the utensil drawer, and the Fresh Zest container, which collects and holds the grated zest and includes measurements to help you know when you have just the right amount!

Lemon-Rosemary Zoodles and Roasted Carrots
Lemon-Rosemary Zoodles with Beans
Ingredients:
1 Tbsp olive oil
3 large zucchini, zoodled or sliced into thin strips/sticks
1 tsp rosemary, chopped
1 clove garlic, minced (1 tsp minced)
1 can white beans, drained and rinsed (red or black beans work just fine too!)
1 lemon, zested and halved
1/2-1 tsp salt, or to taste

Directions:
Heat 1 Tbsp olive oil in large skillet on medium-high. Add beans and garlic. Saute until warm, about 2-3 minutes, stirring occasionally. Add zoodles, rosemary, lemon zest, and salt. Saute 1.5 minutes, stirring frequently. 
Remove zoodle mixture from pan and sear cut ends of halved lemon until browned, roughly 1-2 minutes. Halve or quarter each seared lemon half into wedges.

Divide evenly between 4-5 plates. Serve hot with seared lemon wedges.

Simple Roasted Carrots
Ingredients:
2 bunches small carrots
1-2 Tbsp olive oil
Seasoned salt or garlic salt, to taste (1/2 to 1 tsp)

Directions:
Preheat oven to 400 degrees F. 
Trim greens off carrots, leaving 1/2 to 1" of stems. Wash and peel carrots, then slice in half lengthwise. Toss in oil and lay on baking sheet. Sprinkle with seasoned salt. Bake for 20 minutes.


Products are available on the KitchenIQ website or on Amazon.com
  
[This post contains affiliate links.

Thursday, September 3, 2015

Bacon Egg and Cheese "Muffin" Sandwiches - Plan Ahead and Freeze for an Easy Grab-and-Go Meal Option!

This lunch was sponsored by the American Egg BoardThis post contains affiliate links.
We don't have a lot of time in the mornings, and I'm not known for my time-management skills. And now that I have two kids who need to be up and ready and out the door at the same time, mornings have become twice as hectic! So to try and streamline our routine this back-to-school season, I've started making easy grab-and-go breakfast options in batches and freezing them. Then I can just reheat what each girl requests before heading out the door and they can eat it in the car on the way to school. Bonus: these also make a great lunch option!

We just finished off the banana bread muffins (GF/DF) my sister had made in massive amounts for us, which is what motivated me to start doing this. She made, like, 24 muffins, and my girls weren't really interested in trying them, and I couldn't eat them fast enough. So I froze them. One morning when we were rushed to get my oldest to summer camp, in addition to offering our usual bowl of cereal or chewy bar options, I offered to quickly heat up a muffin. It was a hit! She ate hers AND mine! They became a morning favorite for both girls, who usually only get warm breakfasts on the weekends.

Bacon Egg and Cheese Muffin Sandwiches
Ingredients:
12 eggs
12 oz bacon, cooked and chopped
2 c grated cheese or 6-12 slices, optional
up to 2 c finely chopped veggies, optional (spinach, broccoli, peppers, chives, mushrooms, onion, etc)
1 tsp salt or seasoning salt blend
12 cooked biscuits or english muffins, halved lengthwise (toasted and buttered, if preferred) 

Directions:
Preheat oven to 350 degrees F

Set a 12-cup silicone muffin pan onto a metal baking sheet. Divide veggies evenly into the 12 muffin cups (I prefer using a silicone muffin pan, but a metal one will work if you spray it with oil. The baking sheet is to help you move the silicone pan around without having it flop around and spill everywhere.) 

Divide chopped bacon evenly into the 12 muffin cups. If using, divide the grated cheese into the muffin cups. If using sliced cheese, save until assembly after baking.


Crack open all 12 eggs into a medium-sized mixing bowl. Add salt and whisk together until blended. (I open eggs right into a 4-cup measuring cup with a pour-spout and mix in there to save time and mess later!)

Pour or ladle egg mixture slowly into each muffin cup, filling until about 3/4 full, or to the top of the fillings, whichever is higher. Evenly divide remaining egg mixture, if any.
Bake at 350 degrees F for 25-35 minutes until puffy and starting to brown on top. Should feel firm to the touch. 
Remove from oven and let sit 15 minutes to "set." (If planning to serve any right away and you chose not to bake cheese into the egg, top the ones you plan to eat with cheese now, so it can get nice and melty.)

You may need to gently use a butter knife to separate muffins from the sides, although they usually pop right out of a silicone mold.

For english muffin sandwiches, slice each egg muffin in half lengthwise and cut one of those halves in half crosswise and lay on bottom half of toasted english muffin. If using sliced cheese, add 1/2 to 1 slice of cheese, then top with other half of english muffin. 


For lunchbox-sized sandwiches that fit in my Omiebox and other insulated food jars, I used a round cutter to make smaller english muffin rounds to perfectly fit the egg muffin. I toasted the smaller english muffin rounds for a few minutes on Broil in the oven (along with the scraps) to avoid having to dig around in a toaster for them, which is also easiest when was making a large batch all at once. I trimmed 1/3 lengthwise of the egg muffin off mine, just to make the thickness a better ratio and to fit more evenly, but you don't have to. (And yes, I ate all the scraps!)
Since Z really likes cheese and likes seeing it on her food, instead of baking grated cheese into the egg muffins, I opted to add a partial slice of cheese (cut to fit) on top of the egg before topping with the other half of the english muffin.

Pretty much the same process for biscuit sandwiches, except they should already be the perfect size!

Serve immediately, or cool to room temperature and store in freezer bags or separate with parchment or wax paper in a storage container and refrigerate or freeze. They last up to 1 week in the fridge or longer in the freezer. Reheat in microwave, one for 1 minute, two for 2 minutes, four for 3 minutes, etc.

I packed mine in an Omiebox, which contains an insulated compartment, but Thermos Funtainer food jars would work with biscuit-sized ones or if packed halved to send them hot (warm by lunch,) or the Lunchbots Thermal jar (also available here) would fit most english muffins.

Sunday, May 24, 2015

Sunbutter-Tahini Noodles with Sesame-Crusted Tofu Recipe

Each year I try to pack lunches to show our appreciation for our teachers. I like to use EasyLunchboxes so the teachers have something to keep, and since we've gone to the same preschool over multiple years, some teachers now have several! I made this yummy dish for dinner one night, and it was not only delicious, but tasted great cold the next day too. Perfect for a packed Teacher Appreciation Day lunch! They could eat it cold or heat it up after eating the cold items in the lunchbox. Either way, a tasty filling meal!

 [This post contains affiliate links.

 
One of Z's schools had only 5 teachers total, so I made enough for everyone. Easy enough, and she'd had all but one of the teachers over her tenure at that school! May as well go out with a bang!

Since it was a nut-free school, I made sure to use Sunbutter instead of peanut butter. Which worked out well, since I prefer the taste of Sunbutter in Asian dishes instead of peanut butter anyway! I also used gluten-free noodles and soy sauce (tamari,) since one of the teachers was gluten-free like us. So all the leftovers were safe for me to eat. Bonus!

 
Sesame-Crusted Tofu over Sunbutter-Tahini Noodles
Prep and Cook Time: 30-40 minutes, Serves 3-4
Ingredients 
1 package/14 ounces tofu 
3 scallions
1 lime 
1½ Tbsp Sunbutter or peanut butter
Tbsp tahini paste 
Tbsp soy sauce (or GF alternative,) divided 
Tbsp sesame oil, divided 
Tbsp rice wine vinegar, divided 
2 tsp agave or honey
8 ounces linguine (GF if needed)
Tbsp black sesame seeds, divided 
1 sheet nori (dried seaweed, optional)

Directions
Prep: Remove tofu from packaging, discard liquid, and press and drain. If you don't have a tofu press (I use EZ Tofu Press,) place on a plate sandwiched between 2 clean kitchen or paper towels. Place a heavy object on top (cast iron skillet, stack of plates, small child, etc,) and set aside to drain.
Preheat oven to 450°F 
Bring a large pot of water to a boil over high heat 
Rinse scallions, trim and discard roots, and thinly slice. Set aside.

1. While tofu drains, halve lime. In a large bowl, whisk together juice of 1 lime, Sunbutter or peanut butter, tahini paste, 1 Tbsp soy sauce, ½ tablespoon sesame oil, 1 tablespoon rice wine vinegar, and 1 tablespoon warm water. Taste and add salt as needed. Set aside. 

2. In a large baking dish or zip-close baggie, combine remaining soy sauce, remaining sesame oil, remaining rice wine vinegar, and agave. Cut tofu into 1-inch cubes. Add to marinade, turning to coat. Set aside to marinate at room temperature for about 10 minutes.

3. While tofu marinates, cook linguine per package directions, until al dente. Drain and add to peanut tahini sauce in bowl. Toss to coat. Add scallions and stir to combine. Taste and add salt as needed. Set aside.

4. Remove tofu from marinade, allowing excess to drip off. On a parchment-lined baking sheet, arrange in a single layer. Sprinkle half of black sesame seeds over the tops. Bake until browned, about 10 minutes. Flip, sprinkle with remaining black sesame seeds, and bake until browned and crust has formed, about 10 minutes more.

5. Divide linguine evenly between bowls. Top with tofu and crumble nori over the top to garnish. Store any leftovers in an airtight container in fridge for up to 4 days.

I can't remember what-all went into the salad, but it has organic lettuce, radish, and carrots (cut with a small flower veggie cutter,) and some kind of vinaigrette dressing mixed in. And since I had just gotten a fresh bag of organic cherries straight from the farm, I included some for dessert!

Tools of the Trade
 

Thursday, May 14, 2015

Heirloom Carrot Salad with Spinach-Almond Couscous Gluten-Free Vegan Recipe

This is a quick and easy recipe, and while it has a few "fancy" ingredients, you can easily substitute more common ones for a sure-to-please lunch or dinner option! I included some "Kid-Friendly Tips" for ways to accommodate different tastes using these same ingredients without having to make multiple different meals if you have picky eaters or kids who prefer their ingredients served separately, like mine do.

 
Heirloom Carrot Salad with Spinach-Almond Couscous
Cooking time 15-25 minutes. Serves 2-3 

Ingredients:
1 cup gluten-free couscous (can use quinoa or rice instead.)
2 cups spinach
2 Tbsp sliced almonds
1 bunch heirloom carrots
2 tsp olive oil
1 red onion
1/4 c dried currants (or chopped raisins)
2 Tbsp date molasses (honey or agave would work instead)
2-3 Tbsp unsweetened non-dairy milk or 1/2 cup plain Greek yogurt
2 Tbsp Harissa paste (optional)
10-15 mint leaves (optional)
Salt and pepper to taste

Directions:
Wash and dry the fresh produce.

For the Spinach-Almond Couscous:
Roughly chop the spinach. Set aside.
In a medium pot, heat 1 cup of water and a large pinch of salt until boiling. Add the couscous, cover, and remove from heat. Let stand for 5 minutes, or until the water has been absorbed. (If using rice or quinoa instead, follow package directions for 1/2 cup uncooked rice/quinoa.) (If you're lazy or in a hurry, you can boil water in the microwave instead, then add 1 cup boiling water to 1 cup couscous in a medium bowl, then cover and let sit 5 minutes.)
Fluff with a fork and add the spinach and almonds. [Kid-Friendly Tip: set aside some plain couscous before adding the spinach for your less-adventurous eaters. You can also set aside some plain spinach and add a little of their favorite dressing for a mini salad.] Stir until spinach is slightly wilted.
Season with salt and pepper to taste and set aside in a warm place.

For the Heirloom Carrot Salad:
Peel the carrots, then trim and discard the ends. Quarter the carrots lengthwise (if your carrots are very long, cut in half widthwise first.)
Peel the onion and cut lengthwise into 3/4-inch wide wedges. Separate the layers.

While the couscous cooks, in a large pan, heat 2 tsp of olive oil on medium-high heat until hot.
Add the carrots, and season with salt and pepper. Cook 6-8 minutes, stirring occasionally, or until lightly browned and lightly softened. [Kid-Friendly Tip - you can pull out some of the cooked carrots for your kids at this point.]

Add the onion. Cook 2-4 minutes, stirring occasionally, until softened.

Add the currants, date molasses, 1/2 cup water, and 2 Tbsp non-dairy milk (if using Greek yogurt instead of non-dairy milk, don't add it yet!) Cook 2-4 minutes, stirring and scraping the pan frequently, or until the liquid is slightly reduced into a sauce. Remove from heat.

Optional: If you like heat, add the Harissa paste (and Greek yogurt, if using dairy) to the pan of cooked veggies and sauce, and stir until thoroughly combined. Season with salt and pepper to taste.

Divide the Spinach-Almond Couscous between 2-3 dishes and top each with some of the carrot mixture. Garnish with mint leaves.

Tastes great warm, but leftovers taste nice served chilled as well. Enjoy!


Hubby and I enjoyed the salad as intended, using gluten-free corn-based couscous and dairy-free milk in the sauce. I skipped the heat in mine, since I'm very sensitive to it, but I added a smaller amount to Hubby's serving of carrots before serving it over his couscous.

For the girls, I served them couscous with salt and a little (non-dairy) butter (since it was corn-based, I would have added a little sugar to make it taste more like cornbread, if needed. But they gobbled it down without any added sugar.) Their carrots were pulled out before I added the onions and such, and only had salt and "butter" (the olive oil they were cooked in. Shhhh!) Z chose to eat her spinach plain in big leaves "rabbit-style," and E opted for a little of her favorite vinaigrette and some sliced almonds on top of her chopped spinach salad.
While they might have eaten the couscous mixed with spinach, there would have been a lot of grousing, and they probably would have eaten around the spinach instead of gobbling it down when served separately. There is no way either of them would have touched the carrot salad though. They are both highly averse to sauces ON their foods, and foods mixed together, in general. They're becoming more adventurous, and I can get them to eat some things mixed together, sometimes. But this dish was easy enough to serve separately, without having to go to a lot of effort. It was worth the extra steps of getting out the dressing and butter in exchange for not having to listen to barf noises while I enjoyed my meal!

Saturday, January 31, 2015

Chocolate Raspberry Green Smoothies with Driscoll's! #myberrysmoothie

I love green smoothies because they're a quick and easy way to fill my kids with power-packed nutrients that they'll actually EAT. Add organic Driscoll's berries and they're sure to be a hit every time! What better way to kick off a new year than with a healthy kid-friendly option for breakfast, lunch, or even dessert!
This post was sponsored by Driscoll's Berries!

My little one will drink smoothies no problem, but Big Sis needs a ton of extra sugar to be willing to drink them. If I freeze them in cups or popsicle molds however, she'll eat them all day long! So while she's at school, I make a batch of smoothies for the little one and I, and freeze the leftovers for Big Sis. They make a great after-school snack, and I'm more than happy to let her "indulge" - whole-food fruits, veggies, and protein, with less than a teaspoon of added sugar per serving? Uh, yes! (Bonus: I use either local raw honey to help our seasonal allergies, or else organic elderberry syrup* to boost our immune systems. So even the added sugar is quality, in my mind!)
*I get my elderberry syrup special order through Natural Choice Apothecary on Etsy. (Affiliate link)

Chocolate Raspberry Green Smoothie
Ingredients:
1 cup Driscoll's organic raspberries (fresh or frozen) plus more to garnish (optional)
1 cup organic spinach leaves or 2-3 organic kale leaves, stems removed
1 cup milk (dairy or non-dairy)
1 banana (fresh or frozen)
2 Tbsp cocoa powder
2 Tbsp sweetener of choice (honey, agave, sugar, Norbu, etc - optional. Depends how sweet your fruit is)
1-2 tsp lemon or lime juice or vinegar (optional - to help neutralize the bitterness of the cocoa)
1-2 Tbsp total optional mix-ins: chia seeds, hemp hearts, protein powder, dried milk (or non-dairy milk) powder

Directions: 
Add all ingredients to blender. Blend well!

 
Notes: 
  • I like using at least some frozen produce, so I don't need to add ice to make it cold. Bananas are super easy to freeze (just jam them in the freezer - the peel protects them from freezer burn!) and most places will sell you their overripe stock from the back room at a discount! I also freeze torn kale leaves and extra berries when I find them on sale.
  • I've had best results whizzing greens and seeds together first, before adding frozen items and milk. I add fresh fruit last. But with a powerful enough blender, you can just dump it all in at once.
  • Amount of added liquid can vary each time, so start with only half the milk in wiht the other ingredients, blend, and add more until you reach the desired consistency.
  • Feel free to wait before adding any sweetener. Sometimes the fruit adds plenty of sweetness, other times you'll need to add extra!


 Check out the Driscoll's Berry website for more great berry smoothie recipes
Or if you prefer to experiment and create your own, check out their How to Build A Smoothie guide!


 3pk Berry Baskets
(affiliate links)